
Can you reattach a kitchen side sprayer thumb control yourself? Yes, you absolutely can! Most common issues with a loose or detached thumb control on your kitchen side sprayer can be fixed with simple tools and a bit of patience. This guide will walk you through the process of reattaching your kitchen side sprayer thumb control, addressing common problems, and ensuring your sprayer works like new. We’ll cover everything from basic reattachment to troubleshooting when your kitchen sink sprayer not working.
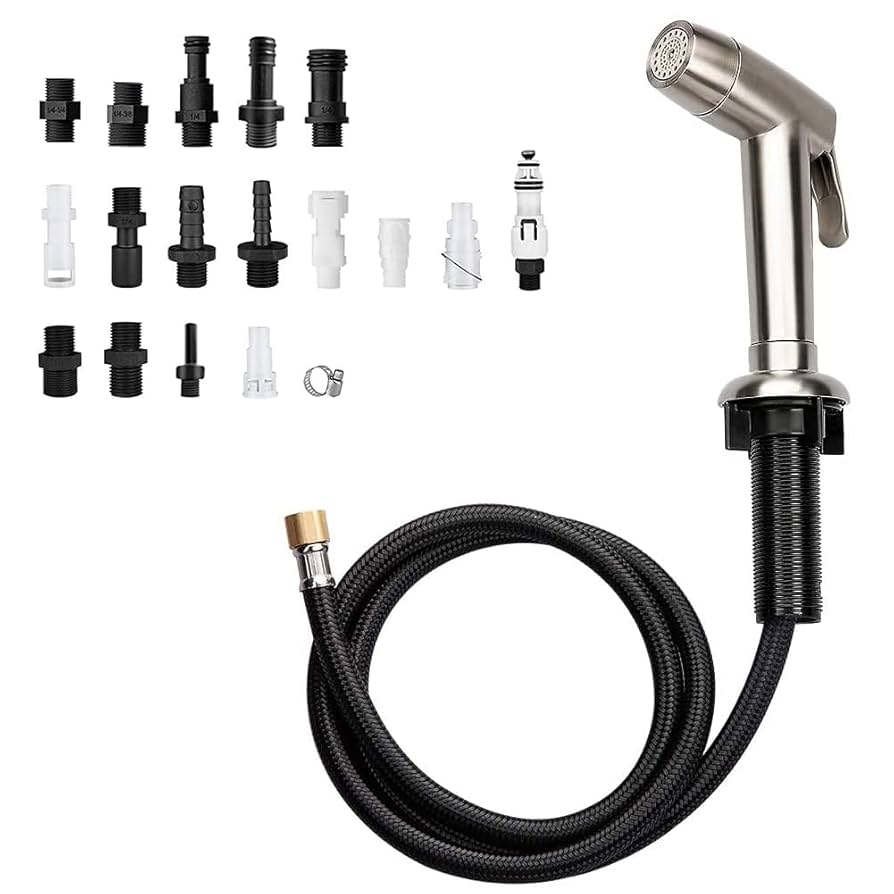
Image Source: m.media-amazon.com
Why Your Sprayer Thumb Control Might Come Loose
Several things can cause the thumb control on your kitchen side sprayer to become loose or detach. Often, it’s due to regular wear and tear. The constant pushing and pulling of the lever can weaken the internal components or the connection points. Sometimes, mineral buildup from hard water can affect how smoothly the control operates, leading to stress on the mechanism. In other cases, a loose fitting or a worn-out internal seal might be the culprit. Knowing these common reasons helps in pinpointing the issue during your kitchen sprayer repair.
Common Causes of Detachment
- Wear and Tear: Repeated use is the most frequent cause.
- Mineral Buildup: Hard water can leave deposits that hinder smooth operation.
- Loose Fittings: Internal parts might loosen over time.
- Damaged Internal Parts: Springs or clips can break or wear out.
Tools You’ll Need for the Job
Before you start, gather the necessary tools. Having everything ready will make the process smoother and prevent frustration. For most reattachment tasks, you won’t need specialized equipment.
Essential Toolkit
- Screwdriver Set: You’ll likely need a Phillips head screwdriver. Some models might require a small flathead screwdriver.
- Pliers: Needle-nose pliers are very useful for gripping small parts.
- Adjustable Wrench: In case you need to loosen or tighten any water connections.
- Towel or Rag: To wipe away any water and keep your workspace clean.
- Small Bowl or Container: To hold small screws or parts so you don’t lose them.
- Lubricant (Optional): A silicone-based spray can help with stiff parts.
- Replacement Parts (If Needed): Sometimes, you might need to replace a worn-out O-ring or clip.
Step-by-Step Guide: Reattaching Your Thumb Control
Let’s get down to business. This section will guide you through the actual process of reattaching your kitchen sprayer’s thumb control.
Step 1: Turn Off the Water Supply
This is the most crucial first step for any kitchen sprayer repair. You don’t want to be dealing with a sudden spray of water!
- Look under your sink for the hot and cold water shut-off valves that connect to your faucet.
- Turn both valves clockwise until they are completely closed.
- Turn on the faucet to drain any remaining water in the lines.
Step 2: Detach the Sprayer Head from the Hose
Most side sprayers have a hose that connects to the faucet body. You need to disconnect the sprayer head to access the handle mechanism.
- Locate where the sprayer hose connects to the faucet or a diverter under the sink.
- You might need your adjustable wrench here. Carefully loosen the connection. It’s usually a threaded fitting.
- Once loosened, pull the sprayer head and hose assembly away from the faucet body.
- Tip: Have your towel ready to catch any drips.
Step 3: Examine the Sprayer Head and Thumb Control
Now that the sprayer head is off, take a closer look at the thumb control and its connection points.
- Look for loose screws: Some sprayer handles have small screws that secure the cover.
- Check for broken clips: Many handles are held together by plastic clips. See if any of these are broken or bent.
- Inspect the trigger mechanism: See if the thumb control itself is intact or if a piece has snapped off.
Step 4: Reattaching the Thumb Control
The method for reattaching will depend on why it came loose in the first place.
Scenario A: Loose Screws
If the thumb control is loose because screws have vibrated out, simply reinsert them and tighten them gently. Be careful not to overtighten, as this can strip the threads or crack the plastic.
Scenario B: Broken Clips
If plastic clips are the issue, this can be more challenging.
- Temporary Fix: You might be able to use a small amount of strong adhesive like super glue or epoxy. Apply it carefully to the broken clip and hold it in place until it sets. This is a temporary solution, and a proper repair or replacement might be needed later.
- Permanent Fix: If you can find a replacement sprayer head or handle assembly, this is the best long-term solution.
Scenario C: Worn Out Trigger or Internal Parts
If the thumb control itself is damaged or a spring inside has broken, you’ll likely need to replace the entire sprayer head or the trigger assembly if it’s sold separately. For attaching a new kitchen sprayer nozzle, you’ll follow a similar process of threading it onto the hose.
Step 5: Reassembling the Sprayer Head
Once the thumb control is secured, put the sprayer head back together.
- If there was a cover, ensure it snaps or screws back into place securely.
- Double-check that all parts are aligned correctly.
Step 6: Reconnecting the Hose
Now, reattach the sprayer head to the faucet’s hose connection.
- Thread the fitting back onto the faucet body or diverter.
- Tighten it with your adjustable wrench, but again, avoid overtightening. A snug fit is usually sufficient.
Step 7: Turn the Water Back On
Carefully turn the shut-off valves back on.
- Turn both valves counter-clockwise.
- Check for any leaks at the connection point you tightened.
Step 8: Test the Sprayer
Turn on the faucet and test the sprayer.
- Operate the thumb control several times.
- Ensure water flows correctly through the sprayer.
- Check for leaks around the thumb control and hose connection.
Troubleshooting Common Sprayer Issues
Sometimes, reattaching the thumb control might not solve all your problems. Your kitchen sink sprayer might not be working as expected, or you might have a new issue.
My Kitchen Sink Sprayer Not Working After Repair
If the sprayer isn’t working at all:
- Check Water Supply: Ensure the main faucet is turned on and water is flowing to the faucet.
- Inspect Connections: Double-check that the hose is securely connected to the faucet and diverter. A loose connection can prevent water from reaching the sprayer.
- Look for Blockages: Mineral deposits can clog the sprayer nozzle. You might need to remove the nozzle and soak it in vinegar. This is part of installing a kitchen sprayer nozzle if you’ve replaced it.
Leaks After Reattachment
If you notice a kitchen sprayer leak repair is needed:
- Hose Connection: The most common leak spot is where the hose connects to the faucet. Try tightening the fitting slightly more. If it still leaks, the washer inside the fitting might be damaged or missing. You may need to replace the washer or the entire hose.
- Sprayer Head: Leaks around the thumb control or where the nozzle attaches could indicate a problem with internal seals or O-rings. Replacing these small parts can often fix the leak.
Low Water Pressure from the Sprayer
Low pressure can be caused by several factors:
- Clogged Nozzle: As mentioned, mineral buildup is a prime suspect.
- Kinked Hose: Ensure the sprayer hose under the sink isn’t kinked or bent in a way that restricts water flow.
- Partially Closed Shut-Off Valve: Make sure the water supply valves under the sink are fully open.
Replacing Parts: A Deeper Dive
Sometimes, simple reattachment isn’t enough. You might need to replace worn-out parts. This is common when dealing with replacing sprayer trigger components or installing a new kitchen sprayer nozzle.
Replacing the Sprayer Nozzle
If your nozzle is clogged beyond repair or you want to upgrade:
- Remove the old nozzle: Most nozzles simply unscrew from the end of the sprayer hose. You might need pliers to grip it, but wrap the nozzle with a cloth to prevent scratching.
- Clean the threads: Wipe down the threads on the hose.
- Install the new nozzle: Screw the new nozzle onto the hose until it’s snug. Some nozzles have a rubber washer that needs to be in place.
Replacing the Trigger Assembly
If the thumb control (trigger) mechanism is broken, you may need to replace the entire sprayer head assembly.
- Identify your sprayer model: Knowing the brand and model of your faucet and sprayer will help you find the correct replacement part.
- Disassemble the old sprayer head: Carefully take apart the old sprayer head to identify the faulty trigger component.
- Install the new assembly: Follow the instructions that come with your new part for attaching side sprayer hose and reassembling the sprayer head.
Attaching a New Side Sprayer Hose
If the hose itself is damaged or leaking, you might need to replace the entire hose assembly.
- Disconnect the old hose: Follow Step 2 to detach the old sprayer head and hose from the faucet.
- Disconnect from the faucet: Under the sink, find where the hose connects to the faucet body or a specific diverter. Disconnect it.
- Connect the new hose: Attach the new hose to the faucet fitting and then reattach the sprayer head to the other end of the new hose. Ensure all connections are secure. This is crucial for attaching faucet sprayer functionality.
Maintenance Tips to Prevent Future Issues
Regular maintenance can save you from frequent kitchen sprayer repair jobs.
- Wipe Down Regularly: Clean your sprayer and handle to prevent dirt and grime buildup.
- Address Leaks Promptly: Small drips can lead to bigger problems, like mineral buildup or corrosion.
- Descale the Nozzle: Periodically soak the sprayer nozzle in a bowl of white vinegar to remove mineral deposits. This helps maintain good water flow and prevents strain on the trigger.
- Check Connections: Occasionally, check under the sink to ensure hose connections are snug.
Common Sprayer Brands and Their Repair Needs
Different brands might have slightly different designs for their sprayer handles and hose connections. Knowing your brand can help when searching for replacement parts or specific repair guides.
| Brand | Common Issues | Typical Repair Focus |
|---|---|---|
| Moen | Worn O-rings, plastic trigger fatigue | Replacing O-rings, trigger assembly |
| Delta | Loose handle screws, hose connections | Tightening screws, checking washers |
| Kohler | Mineral buildup in nozzle, hose connection leaks | Descaling, tightening connections |
| Kraus | Internal valve seals, plastic clips on handles | Replacing seals, handle components |
| American Std | Wear on the diverter mechanism, hose fraying | Replacing diverter, hose replacement |
This table provides a general overview. Always consult your specific faucet manual for the most accurate information.
Frequently Asked Questions (FAQ)
How often should I replace my kitchen sprayer head?
There’s no set schedule for replacing a kitchen sprayer head. If it’s functioning well and not leaking, it can last for many years. However, if you notice persistent issues like poor spray patterns, leaks, or a broken trigger, it’s time for a replacement.
Can I use plumber’s tape on the hose connections?
Yes, a small amount of plumber’s tape (PTFE tape) can be helpful on threaded hose connections to ensure a watertight seal and make future disconnections easier. Apply it in the direction of the threads.
My faucet has a built-in sprayer, not a side sprayer. How is this different?
For faucets with a built-in side sprayer, the handle mechanism and hose connection are integrated into the main faucet body. The process of reattaching or fixing the thumb control will be similar, but the disassembly might involve removing the entire faucet handle or a specific cover plate on the faucet base. The core principles of turning off water, identifying the problem, and reassembling remain the same when fixing your kitchen faucet sprayer.
What if I can’t find the exact replacement part?
If you can’t find an exact match for a specific component, you might need to replace the entire sprayer hose assembly or even the faucet itself. Sometimes, universal repair kits are available, but it’s always best to try and match your existing parts for the best fit and function.
Is it worth repairing an old sprayer, or should I just replace the faucet?
For minor issues like a loose thumb control or a minor leak, repairing is often cost-effective and environmentally friendly. However, if your faucet is old and has multiple problems, or if you’re looking for an upgrade, replacing the entire faucet might be a better long-term investment.
By following these steps and tips, you can confidently tackle the task of reattaching your kitchen side sprayer thumb control. Happy fixing!