
Thinking about how to redo kitchen cabinets? You can absolutely tackle this yourself! This guide will walk you through refreshing your kitchen cabinets, whether you want to refinish kitchen cabinets, refurbish kitchen cabinets, or give your kitchen cabinet makeover a whole new look. We’ll cover everything from painting kitchen cabinets to cabinet hardware replacement, and even how to reface kitchen cabinets.
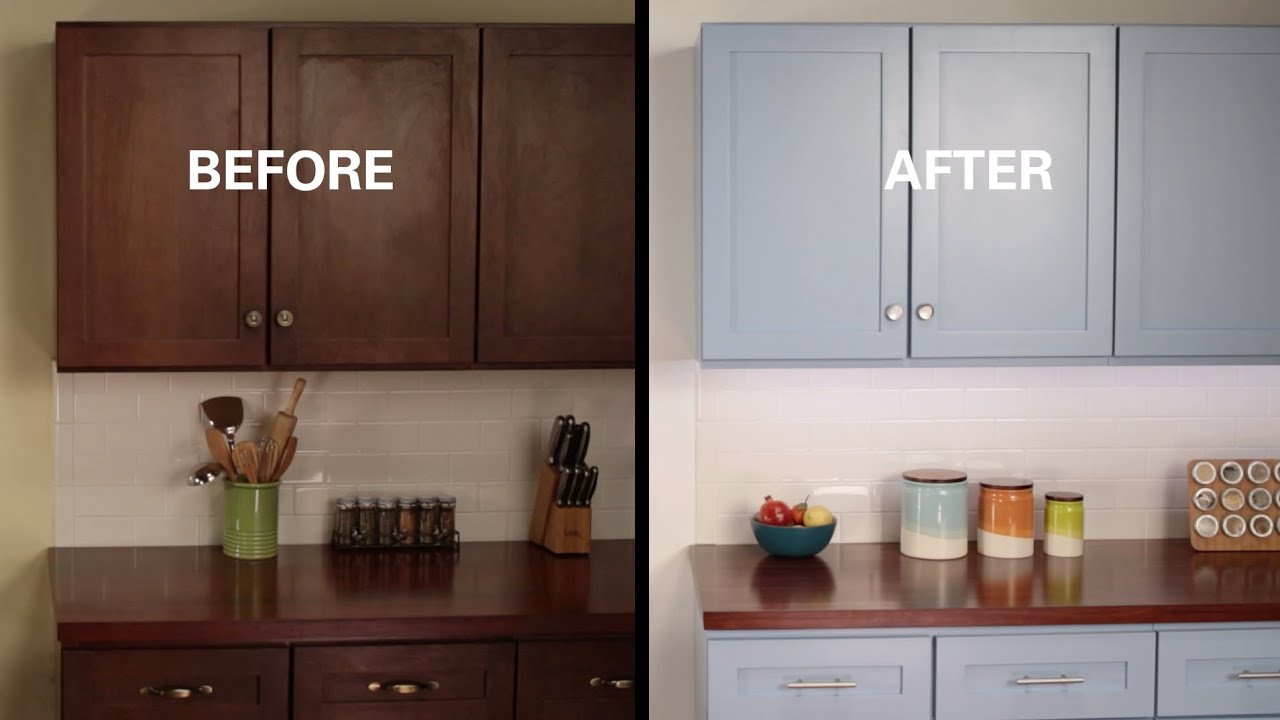
Image Source: i.ytimg.com
Your Kitchen Cabinet Refurbishment Journey Begins
Redoing your kitchen cabinets can dramatically change the feel of your entire kitchen. It’s a rewarding DIY project that can save you a lot of money compared to professional services or buying entirely new cabinets. This guide is designed for the ambitious DIYer looking to update kitchen cabinets and achieve a beautiful, lasting result. We’ll explore different methods, essential tools, and step-by-step processes to help you master kitchen cabinet restoration.
Choosing Your Kitchen Cabinet Redo Method
There are several popular ways to redo kitchen cabinets, each with its own pros and cons. Deciding which method is best for you depends on your budget, desired look, and the current condition of your cabinets.
Method 1: Painting Kitchen Cabinets
Painting is the most common and often the most impactful way to redo kitchen cabinets. It allows for a complete color change and can make old, worn cabinets look brand new.
What You’ll Need:
- Cleaning Supplies: Degreaser, clean cloths, TSP (Trisodium Phosphate) or a TSP substitute, water.
- Sanding Supplies: Sandpaper (120-grit and 220-grit), sanding block or orbital sander, tack cloth.
- Primer: High-quality stain-blocking primer (especially important for wood cabinets with knots).
- Paint: Cabinet-specific paint (alkyd enamel or water-based acrylic enamel are good choices), in your desired finish (satin, semi-gloss, or gloss).
- Applicators: High-density foam rollers, angled sash brush, paint trays.
- Protection: Painter’s tape, drop cloths, plastic sheeting.
- Optional: Wood filler for repairs, new cabinet hardware.
Step-by-Step Painting Process:
Step 1: Preparation is Key (Don’t Skip This!)
This is the most crucial step for a professional finish.
- Empty the Cabinets: Remove everything from your cabinets.
- Remove Doors and Drawers: Carefully take off all cabinet doors and drawer fronts. Label them if needed to ensure you put them back correctly.
- Remove Hardware: Unscrew all hinges, knobs, and pulls. Keep them organized, perhaps in labeled baggies.
- Clean Thoroughly: Use a degreaser and clean cloths to remove any grease, grime, or residue. For stubborn grease, TSP is very effective, but always follow safety instructions. Rinse well with clean water and allow to dry completely.
- Repair Imperfections: Fill any holes or gouges with wood filler. Let it dry, then sand it smooth.
- Tape Off Areas: Use painter’s tape to protect any areas you don’t want painted, like countertops or the inside of the cabinet frames.
Step 2: Sanding for Adhesion
Sanding creates a surface that paint can grip onto.
- Initial Sanding: Use 120-grit sandpaper to lightly scuff the entire surface of the doors, drawer fronts, and cabinet frames. You’re not trying to remove the old finish, just create a dull, slightly rough surface.
- Second Sanding: Follow up with 220-grit sandpaper for a smoother finish. This will help your paint go on more evenly.
- Clean Dust: After sanding, wipe down all surfaces with a tack cloth to remove every bit of dust. Dust is the enemy of a smooth paint finish.
Step 3: Priming for a Flawless Finish
Primer is essential for good paint adhesion and to block stains from bleeding through.
- Apply Primer: Apply a thin, even coat of your stain-blocking primer using a brush or roller. Work in the direction of the wood grain.
- Allow to Dry: Let the primer dry completely according to the manufacturer’s instructions.
- Light Sanding (Optional but Recommended): Once dry, lightly sand the primed surfaces with 220-grit sandpaper. This smooths out any brush strokes or imperfections in the primer. Wipe clean with a tack cloth again.
Step 4: Painting Your Cabinets
Now for the fun part!
- First Coat of Paint: Apply a thin, even coat of your chosen cabinet paint. For a smooth finish, use a high-density foam roller for flat surfaces and an angled sash brush for edges and details. Avoid overloading your roller or brush.
- Allow to Dry: Let the first coat dry thoroughly. Check the paint can for recommended drying times between coats.
- Second Coat: Apply a second coat, following the same technique. Most projects will require at least two coats for full coverage.
- Third Coat (If Needed): For very light colors over dark cabinets, a third coat might be necessary.
- Drying and Curing: Allow the paint to dry completely. Be aware that paint takes time to fully cure (harden), which can be several days to a few weeks. Avoid heavy use during the curing period.
Step 5: Reassemble and Enjoy
- Reattach Hardware: Once the paint is dry (and ideally, has cured for a day or two), reattach your original hardware or install your new cabinet hardware replacement.
- Rehang Doors and Drawers: Carefully rehang your cabinet doors and reinsert your drawers.
- Admire Your Work: Step back and enjoy your beautifully redone kitchen cabinets!
Method 2: Refinishing Kitchen Cabinets (Staining)
If your cabinets are made of a beautiful wood that you want to showcase, refinishing is the way to go. This process involves stripping the old finish and applying a new stain.
What You’ll Need:
- Stripping Supplies: Chemical paint stripper, stripper scraper, steel wool (medium and fine grade), mineral spirits.
- Sanding Supplies: Sandpaper (100-grit, 150-grit, 220-grit), sanding block or orbital sander, tack cloth.
- Stain: Oil-based or water-based wood stain in your desired color.
- Sealer/Topcoat: Polyurethane, polycrylic, or lacquer in a satin or semi-gloss finish.
- Applicators: Foam brushes, rags, fine-grit sandpaper (320-grit) for between coats.
- Protection: Painter’s tape, drop cloths, chemical-resistant gloves, safety glasses, respirator.
Step-by-Step Refinishing Process:
Step 1: Stripping the Old Finish
This is the most labor-intensive part.
- Safety First: Work in a well-ventilated area, wearing gloves, safety glasses, and a respirator. Cover your workspace with drop cloths.
- Apply Stripper: Apply the chemical stripper generously to a small section at a time using a brush. Let it sit for the time recommended by the manufacturer.
- Scrape Away Finish: As the finish loosens, use a scraper to gently lift it away. Work with the grain of the wood.
- Clean Residue: Use steel wool (medium grade) dipped in mineral spirits to remove any remaining old finish and stripper residue.
- Wipe Down: Wipe down the entire surface with clean rags to remove all traces of stripper and dissolved finish. Let the wood dry completely.
Step 2: Sanding for a Smooth Surface
Proper sanding is crucial for even stain absorption.
- Initial Sanding: Once the wood is dry, start with 100-grit sandpaper to smooth out any rough spots or leftover finish.
- Progressive Sanding: Move to 150-grit, then 220-grit sandpaper. Always sand in the direction of the wood grain.
- Detail Sanding: Use sanding sponges or folded sandpaper for corners and crevices.
- Dust Removal: Thoroughly wipe down all surfaces with a tack cloth to remove all dust.
Step 3: Applying Wood Stain
Stain brings out the beauty of the wood.
- Test the Stain: Always test your stain on a scrap piece of wood from your cabinets or an inconspicuous area to ensure you like the color.
- Apply Stain: Apply the stain evenly with a foam brush or a clean rag, working in the direction of the wood grain. Don’t let the stain puddle.
- Wipe Off Excess: After a few minutes (check stain instructions for timing), wipe off the excess stain with a clean, lint-free rag, again working with the grain. This determines the depth of the color. The longer you leave it on before wiping, the darker the stain.
- Second Coat (Optional): If you desire a darker or richer color, you can apply a second coat after the first has dried completely, repeating the application and wiping process.
Step 4: Sealing and Protecting
A topcoat protects the stain and provides durability.
- Apply Sealer/Topcoat: Once the stain is completely dry (this can take 24-72 hours, depending on the stain and humidity), apply your first coat of polyurethane or chosen topcoat. Use a good quality brush or foam applicator. Apply thin, even coats.
- Light Sanding Between Coats: After the first coat is dry, lightly sand the surface with 320-grit sandpaper to knock down any raised grain or imperfections. Wipe away dust with a tack cloth.
- Subsequent Coats: Apply 2-3 more coats, sanding lightly between each coat.
- Curing: Allow the topcoat to cure fully before putting your cabinets back into use.
Method 3: Kitchen Cabinet Resurfacing
Kitchen cabinet resurfacing is a great option if your cabinet boxes are in good shape but the doors and drawer fronts are dated or damaged. It involves replacing the visible parts of your cabinets with new materials.
What You’ll Need:
- New Doors and Drawer Fronts: Order these custom-made to your exact specifications from a cabinet maker or online supplier. You can choose from various wood types, laminates, or thermofoil.
- New Cabinet Hardware: Essential for a fresh look.
- Screwdriver: For removing old hardware and installing new.
- Measuring Tape: To ensure accurate ordering of new parts.
- Optional: Wood filler, sandpaper, paint/stain if you’re finishing the new components yourself.
Step-by-Step Resurfacing Process:
Step 1: Measure and Order
- Measure Carefully: Measure the exact dimensions of your existing cabinet doors and drawer fronts. Note whether they are overlay or inset.
- Choose Style and Material: Decide on the style of door (shaker, raised panel, flat panel) and the material you want.
- Order New Components: Place your order for new doors and drawer fronts. Many companies offer unfinished options if you plan to paint or stain them yourself to match your existing cabinet boxes.
Step 2: Prepare Existing Cabinet Boxes
- Clean: Clean the cabinet boxes thoroughly.
- Repair (If Needed): Fill any minor damage with wood filler and sand smooth.
- Paint or Stain: If your new doors and drawer fronts will be a different color or finish than your existing boxes, now is the time to paint or stain the cabinet boxes to match.
Step 3: Install New Doors and Drawer Fronts
- Attach Hinges: Attach new hinges to the new cabinet doors.
- Mount Doors: Mount the doors to the cabinet boxes. You may need to adjust the hinges to ensure doors hang straight and have even gaps.
- Attach Drawer Fronts: Adhere the new drawer fronts to the existing drawer boxes. You might need to drill pilot holes from the inside of the drawer box to secure them.
- Install Hardware: Install your new cabinet hardware replacement on the doors and drawer fronts.
Step 4: The Finishing Touch
- Final Adjustments: Make any final adjustments to hinges for perfect alignment.
- Clean Up: Clean any fingerprints or smudges.
Method 4: Refacing Kitchen Cabinets
Refacing kitchen cabinets involves applying a thin veneer or laminate to the existing cabinet frames and installing new doors and drawer fronts. This gives the appearance of entirely new cabinets while often being less costly than full replacement.
What You’ll Need:
- Veneer or Laminate Sheets: Choose a high-quality material that matches your new doors.
- Contact Cement or Spray Adhesive: For adhering the veneer/laminate.
- Utility Knife or Straight Edge Cutter: For precise cutting of the veneer.
- Smooth Roller or Bondo Spreader: To press the veneer firmly onto the cabinet boxes.
- New Cabinet Doors and Drawer Fronts: As described in the resurfacing method.
- New Cabinet Hardware: For the new doors and drawer fronts.
- Screwdriver, Measuring Tape.
- Cleaning Supplies, Painter’s Tape.
Step-by-Step Refacing Process:
Step 1: Prepare Cabinet Boxes
- Clean Thoroughly: Ensure cabinet frames are clean, dry, and free from grease or dust.
- Remove Hardware: Remove all hinges, knobs, and pulls.
- Tape Edges: Protect any areas that won’t be covered with veneer using painter’s tape.
Step 2: Apply Veneer or Laminate to Cabinet Frames
- Cut Veneer: Measure and cut your veneer or laminate sheets to fit each cabinet frame section. It’s often best to cut slightly larger and trim precisely later.
- Apply Adhesive: Apply contact cement or spray adhesive to both the cabinet frame and the back of the veneer, following the product instructions carefully. Allow the adhesive to become tacky.
- Carefully Apply Veneer: Starting at one edge, carefully press the veneer onto the cabinet frame, smoothing it down with a roller or spreader as you go to avoid air bubbles. Work slowly and deliberately.
- Trim Edges: Once applied, use a sharp utility knife or straight edge cutter to trim any excess veneer flush with the cabinet edges.
- Repeat: Continue this process for all visible cabinet frame surfaces.
Step 3: Install New Doors and Drawer Fronts
This step is identical to Step 3 in the “Kitchen Cabinet Resurfacing” method.
- Attach Hinges: Attach new hinges to the new cabinet doors.
- Mount Doors: Mount the doors to the cabinet boxes.
- Attach Drawer Fronts: Adhere the new drawer fronts to the existing drawer boxes.
- Install Hardware: Install your new cabinet hardware replacement on the doors and drawer fronts.
Step 4: Final Touches
- Adjust Doors: Make sure doors hang straight and have even gaps.
- Clean Up: Remove painter’s tape and clean any smudges.
Cabinet Hardware Replacement: The Finishing Sparkle
No kitchen cabinet redo is complete without considering new hardware. Cabinet hardware replacement is a simple yet highly effective way to update the look of your kitchen.
Choosing New Hardware:
- Style: Consider the overall style of your kitchen. Modern kitchens might suit sleek, minimalist pulls, while a farmhouse or traditional kitchen might look great with decorative knobs or ornate handles.
- Finish: Popular finishes include brushed nickel, chrome, matte black, brass, and oil-rubbed bronze. Ensure the finish complements your cabinet color and other kitchen fixtures.
- Functionality: Choose hardware that is comfortable to grip and easy to use. Measure the distance between screw holes on existing drawers and doors to ensure compatibility with new pulls.
- Budget: Hardware prices can vary widely. Set a budget before you shop.
Installing New Hardware:
- Remove Old Hardware: Unscrew any existing knobs or pulls.
- Fill Old Holes (If Necessary): If your new hardware has different hole spacing, you may need to fill the old holes with wood filler, let it dry, sand smooth, and then drill new pilot holes in the correct location.
- Mark New Holes: Use a template or a measuring tape to mark the precise locations for your new hardware. Ensure they are level and centered.
- Drill Pilot Holes: Drill pilot holes for the screws. This prevents the wood from splitting.
- Attach New Hardware: Screw the new knobs or pulls into place from the inside of the door or drawer front.
- Tighten: Tighten securely, but be careful not to overtighten, which could strip the screws or damage the cabinet.
Tips for a Professional DIY Kitchen Cabinet Makeover
- Take Your Time: Rushing any of these steps can lead to a less-than-perfect result. Patience is key.
- Work in Batches: If you have many doors and drawers, work on them in batches to stay organized.
- Good Lighting: Ensure you have good lighting in your workspace for accurate application and detail work.
- Ventilation: Always work in a well-ventilated area, especially when using strippers, primers, paints, or solvents.
- Invest in Quality Tools: Good quality brushes, rollers, and sandpaper will make a significant difference in your final finish.
- Read Manufacturer Instructions: Always follow the specific instructions on your chosen paint, stain, primer, or adhesive.
Frequently Asked Questions (FAQ)
Q1: Can I redo kitchen cabinets myself?
A1: Yes, absolutely! With careful preparation, the right tools, and patience, you can successfully redo your kitchen cabinets yourself. Many DIYers achieve professional-looking results by following detailed guides.
Q2: What’s the difference between refinishing and painting kitchen cabinets?
A2: Refinishing kitchen cabinets typically involves stripping the old finish and applying a new stain to highlight the natural wood grain. Painting kitchen cabinets covers the existing finish with a new opaque color, offering a complete transformation in hue.
Q3: How long does it take to redo kitchen cabinets?
A3: The time it takes can vary greatly depending on the method chosen, the size of your kitchen, and your experience level. Painting can take anywhere from a weekend to a week or more, with drying times factored in. Refinishing, especially stripping, can take longer. Resurfacing or refacing involves ordering custom parts, which adds lead time.
Q4: What is the most durable finish for kitchen cabinets?
A4: For painted cabinets, a high-quality cabinet enamel (like acrylic enamel or alkyd enamel) is very durable. For stained cabinets, a good quality polyurethane or polycrylic topcoat offers excellent protection against moisture and wear.
Q5: Should I remove my cabinet doors before painting?
A5: Yes, it is highly recommended to remove cabinet doors and drawer fronts before painting for a much smoother and more professional finish. This allows you to paint all sides and edges thoroughly without drips on the cabinet frames and makes it easier to achieve an even coat.
Q6: Do I need to prime cabinets before painting?
A6: Yes, priming is almost always essential. Primer ensures better adhesion of the paint, covers stains that might bleed through, and provides a uniform base color for your topcoat, resulting in a more even and durable finish.
Q7: What is the best way to update kitchen cabinets without replacing them?
A7: The most effective ways to update kitchen cabinets without replacing them include painting, refinishing (staining), resurfacing (replacing doors/drawer fronts), or refacing (applying veneer to frames and adding new doors/drawer fronts). A simple cabinet hardware replacement can also make a big difference.
By following this comprehensive guide, you’re well-equipped to tackle your own DIY kitchen cabinets project. Whether you aim to refinish kitchen cabinets, paint kitchen cabinets, or explore other options like resurfacing or refacing, you can achieve a stunning kitchen cabinet makeover. Happy renovating!