
Can I reface kitchen cabinets myself? Yes, you absolutely can reface kitchen cabinets yourself! This guide breaks down how to do it step-by-step, helping you achieve a beautiful kitchen cabinet makeover without a professional contractor. Refacing your cabinets is a fantastic way to update your kitchen’s look without the full expense and mess of a complete renovation. It’s a rewarding DIY project that can significantly boost your home’s appeal.
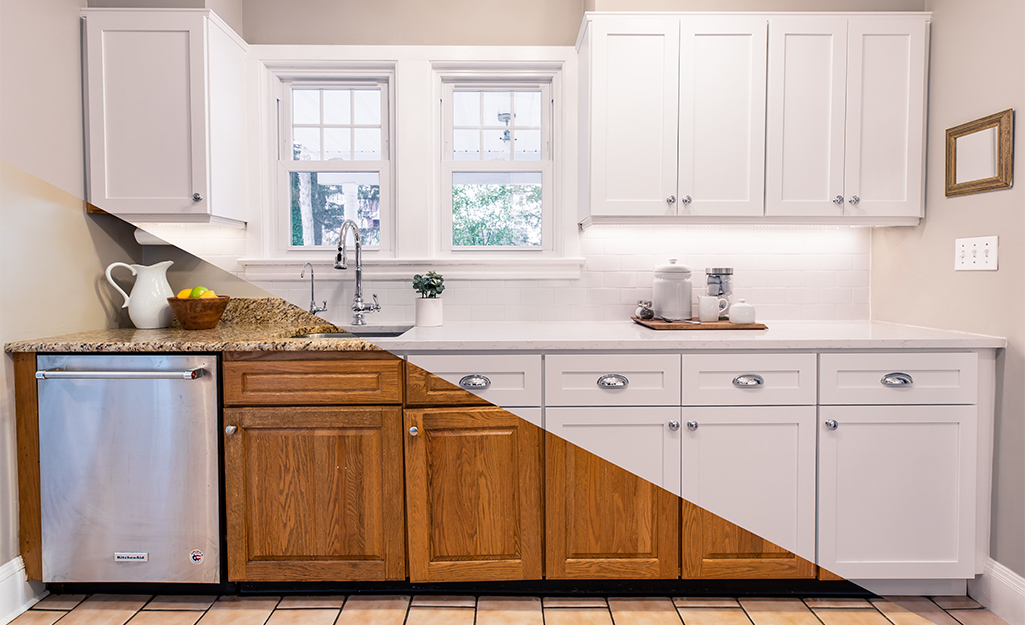
Image Source: contentgrid.homedepot-static.com
What is Cabinet Refacing?
Cabinet refacing is a process where you update the visible parts of your existing cabinets. Instead of tearing out and replacing your entire cabinet boxes, you give them a fresh new look. This typically involves:
- Replacing doors and drawer fronts: This is the most impactful part. You choose new styles and colors to completely change the look.
- Applying new veneer or laminate: The exposed sides of your cabinet boxes, often called “face frames” or “guts,” get a new finish to match your new doors.
- Upgrading hardware: New knobs and pulls can add a stylish finishing touch.
It’s a smart alternative to cabinet painting or cabinet refinishing if you want a dramatic change with a durable and professional-looking finish.
Why Choose Cabinet Refacing?
Cabinet refacing offers several advantages over other kitchen updates:
- Cost-Effective: Compared to a full kitchen remodel, refacing is usually much more affordable. You save on the cost of new cabinet boxes and installation labor.
- Faster: The process is quicker than a full gut renovation, meaning less disruption to your daily life.
- Less Mess: You aren’t dealing with the dust and debris of demolition.
- Eco-Friendly: You’re reusing the existing cabinet boxes, which reduces waste.
- Customizable: You can choose from a wide range of styles, colors, and materials for your new doors and drawer fronts.
Planning Your DIY Cabinet Refacing Project
A successful DIY cabinet refacing project starts with careful planning. This ensures you get the look you want and that the process goes smoothly.
Step 1: Assess Your Current Cabinets
Before you buy anything, take a good look at what you have.
- Cabinet Box Condition: Are the cabinet boxes themselves sturdy and in good shape? Refacing works best when the boxes are solid. If they are water-damaged, warped, or rotten, you might need to consider replacement or a more intensive repair.
- Style: What is the current style of your cabinets? Modern, traditional, shaker, flat-panel? This will help you choose new doors and drawer fronts that complement your kitchen.
- Measurements: This is crucial. You need to measure every door and drawer front precisely.
Measuring for New Doors and Drawer Fronts
-
Overlay: Most cabinets have an overlay, meaning the doors and drawer fronts extend over the cabinet box frame.
- Full Overlay: Doors and drawer fronts cover most of the cabinet frame. There’s very little of the frame visible.
- Partial Overlay: Doors and drawer fronts cover only a portion of the frame.
- Inset: Doors and drawer fronts sit inside the frame, flush with the surface. This is less common for refacing projects.
-
How to Measure:
- Remove an Existing Door: It’s easiest to measure when a door is off.
- Measure Width: Measure the width of the door from edge to edge.
- Measure Height: Measure the height of the door from top to bottom.
- Measure Thickness: Measure the thickness of the door. Most cabinet doors are 3/4 inch thick.
- For Drawer Fronts: Measure the width and height of the drawer front, just like you did for the doors.
- Account for Overlay: When ordering new doors and drawer fronts, the supplier will ask about your overlay type and if you want them to match your existing doors or have a specific overlay. For DIY, it’s often easiest to order doors/drawer fronts that are slightly larger than your existing ones to achieve a full overlay.
- Hinge Type: Note the type of hinges your current cabinets use. You’ll want to order new doors that are compatible with your existing hinge cutouts or choose new hinges if you plan to update those as well.
Step 2: Choose Your New Look
This is the fun part! You have several options for updating the look of your cabinet doors and drawer fronts:
-
Cabinet Door Replacement: This is the most common method for refacing. You order brand-new doors and drawer fronts in your desired style, material, and color. This gives you the most dramatic change.
- Materials:
- Wood: Solid wood (maple, cherry, oak) offers a classic, high-end look.
- MDF (Medium-Density Fiberboard): A good option for painted cabinets as it provides a smooth surface.
- Thermofoil: A vinyl film applied over MDF. It’s durable, easy to clean, and available in many colors and finishes, including wood grain.
- Laminate: Similar to thermofoil, laminate offers durability and a wide range of finishes. Laminate cabinet doors are a popular choice for modern kitchens.
- Styles:
- Shaker: Simple, clean lines with a center panel. Very popular and versatile.
- Slab/Flat Panel: A minimalist, modern look.
- Raised Panel: Traditional style with a raised center panel.
- Recessed Panel: A variation of shaker where the center panel is recessed.
- Materials:
-
Cabinet Veneer: This is what you’ll use to cover the exposed cabinet box frames.
- Wood Veneer: Thin sheets of real wood that can be glued onto the cabinet frames. They can be stained or painted.
- Melamine/Laminate Sheets: These are pre-finished and come in various colors and wood grain patterns. They are often easier to apply for DIYers.
-
Cabinet Painting: While not strictly refacing, it’s a popular alternative. You can paint your existing doors and drawer fronts. This is a more budget-friendly option but requires meticulous prep work for a durable finish.
-
Cabinet Refinishing: This involves stripping old paint or stain and applying a new finish. It’s more labor-intensive than painting and is best for cabinets with good quality wood.
Step 3: Calculate Cabinet Refacing Cost
The cabinet refacing cost can vary widely depending on the materials you choose and the size of your kitchen. For DIY, you’re primarily paying for materials.
- New Doors and Drawer Fronts: This is often the biggest expense. Costs can range from $50-$150+ per door/drawer front, depending on material and style.
- Veneer/Laminate Sheets: For covering cabinet boxes, expect to pay $30-$80 per sheet, depending on the size and material.
- Adhesive: A good quality spray adhesive or contact cement is needed.
- Primer and Paint (if painting): Quality paint, primer, and sealant add to the cost.
- Cabinet Hardware Upgrade: Knobs and pulls can range from $2-$20+ each.
- Tools: If you don’t have them, you’ll need measuring tapes, screwdrivers, a utility knife, sandpaper, caulk gun, possibly a router if you need to adjust hinge mortises.
Example DIY Cabinet Refacing Cost Estimate (Small Kitchen):
| Item | Estimated Cost Range | Notes |
|---|---|---|
| New Doors & Drawer Fronts | $800 – $2000 | 10-15 doors/drawers, mid-range material |
| Veneer/Laminate Sheets | $100 – $300 | For exposed cabinet frames |
| Adhesives | $30 – $70 | Contact cement or spray adhesive |
| Primer/Paint/Sealant | $50 – $150 | If painting exposed frames |
| Cabinet Hardware | $50 – $200 | Knobs/pulls for all doors/drawers |
| Miscellaneous Supplies | $20 – $50 | Sandpaper, cleaning supplies, caulk |
| Total Estimated Cost | $1050 – $2770 | This is a rough estimate; actual cost varies. |
Step 4: Order Your Materials
Once you have your measurements and chosen your style, it’s time to order.
- Online Retailers: Many websites specialize in custom cabinet doors and drawer fronts. They allow you to input your exact dimensions and choose your style, material, and finish.
- Local Cabinet Shops: You can also find local shops that can make custom doors.
- Veneer/Laminate: Look for these at home improvement stores or specialized woodworking suppliers.
Pro Tip: Order a few extra doors or drawer fronts if your budget allows. Mistakes can happen, and it’s better to have spares than to wait for a replacement.
The DIY Cabinet Refacing Process
Now that you’ve planned and ordered, it’s time to get to work!
Preparation is Key
This is the most critical phase. Proper preparation ensures a professional-looking finish.
- Empty Cabinets: Remove all contents from your cabinets.
- Remove Doors and Drawer Fronts:
- Use a screwdriver to detach the hinges from the cabinet frame. Keep the screws organized, perhaps in small labeled bags for each door.
- For drawer fronts, there might be screws from the inside of the drawer box.
- Remove Drawer Boxes: You might need to remove the entire drawer boxes to apply veneer or laminate to the sides.
- Clean Everything:
- Cabinet Boxes: Clean the cabinet boxes thoroughly. Use a degreaser to remove any grease or grime. Wipe down with a damp cloth and let them dry completely.
- Existing Doors/Drawer Fronts (if reusing/painting): If you plan to paint your existing doors, you’ll need to clean them, lightly sand them, and prime them.
- Sand (if needed): If the cabinet boxes have a glossy finish, a light sanding will help the new veneer or laminate adhere better. For veneering or applying laminate, you mainly need a clean, smooth surface. If you’re painting the frames, sand thoroughly.
Applying Veneer or Laminate to Cabinet Boxes
This step covers the exposed parts of your cabinet boxes, such as the face frames.
Using Cabinet Veneer
- Measure and Cut: Measure the areas you need to cover on your cabinet boxes. Cut the veneer sheets to size using a sharp utility knife or a fine-tooth saw. Always cut slightly larger than you need and trim later for a perfect fit.
- Apply Adhesive: Most wood veneers require a contact cement. Apply the adhesive evenly to both the cabinet box surface and the back of the veneer sheet. Follow the adhesive manufacturer’s instructions for drying time – usually, you wait until the adhesive is tacky but not wet.
- Apply Veneer: Carefully align the veneer with the edge of the cabinet box. Once it makes contact, it will stick. Smooth it down firmly, working from the center outwards to avoid air bubbles. A J-roller or a piece of scrap wood can help with this.
- Trim Edges: Use a sharp utility knife to carefully trim any excess veneer along the edges. A metal ruler or straight edge will help you get clean cuts.
- Repeat: Continue this process for all exposed cabinet box surfaces.
Using Laminate Sheets
Laminate is a bit different. It often comes with a pre-applied adhesive (peel-and-stick) or requires a spray adhesive.
- Measure and Cut: Similar to veneer, measure and cut your laminate sheets.
- Peel and Stick (if applicable): If it’s peel-and-stick laminate, carefully peel off the backing and align it with the cabinet surface. Press firmly, working out any air bubbles.
- Adhesive Application: If using spray adhesive, apply it to both surfaces as per instructions.
- Smoothing and Trimming: Use a roller to ensure good adhesion and a utility knife for trimming.
Installing New Doors and Drawer Fronts
This is where your kitchen starts to transform!
-
Prepare New Doors/Drawer Fronts:
- Hinge Holes: If your new doors don’t come with pre-drilled hinge holes, you’ll need to drill them. You’ll need a special hinge boring bit (like a Forstner bit) for clean, precise holes. Measure carefully to match the placement of your old hinges.
- Hardware Holes: If your new doors and drawer fronts don’t have pre-drilled holes for knobs or pulls, drill them now. Measure accurately to ensure they are centered and level.
-
Install Hinges on Doors/Drawer Fronts: Attach the hinges to the new doors and drawer fronts using the screws provided.
-
Attach Doors to Cabinet Boxes:
- Hold a door in place against the cabinet box.
- Align the hinges with the pre-drilled holes on the cabinet frame.
- Screw the hinges to the cabinet frame. Start with a few screws to hold it in place, then ensure the door is aligned correctly before tightening all screws.
- You might need to adjust the hinges slightly to get the doors perfectly straight and evenly spaced. Most cabinet hinges have adjustment screws for up/down, in/out, and side-to-side movement.
-
Install Drawer Fronts:
- Align the new drawer front with the drawer box.
- From the inside of the drawer box, screw through the box into the back of the drawer front. Make sure the front is centered and straight before screwing.
Adding Cabinet Hardware
This is the final flourish!
- Attach Knobs and Pulls: Use screws to attach your new cabinet hardware through the pre-drilled holes in your new doors and drawer fronts.
Finishing Touches
- Caulk: If there are any small gaps between the veneered surfaces and the cabinet frame, you can fill them with paintable caulk for a seamless look.
- Clean Up: Remove all tools, debris, and protective coverings. Wipe down your new cabinets to remove any fingerprints or dust.
Alternatives to Refacing
If DIY cabinet refacing seems too daunting, or if you’re looking for different approaches, consider these:
Cabinet Painting
- Pros: Very affordable, allows for custom color choices, can give a fresh look.
- Cons: Requires extensive prep work (cleaning, sanding, priming), can be time-consuming, prone to chipping if not done correctly, may not be as durable as new doors.
- Process: Thorough cleaning, degreasing, sanding, priming, and applying multiple thin coats of paint (latex, enamel, or lacquer) with a sprayer for the best finish.
Cabinet Refinishing
- Pros: Restores the natural beauty of wood, can change the stain color, creates a durable finish.
- Cons: Very labor-intensive (stripping, sanding, staining, sealing), requires specialized products and techniques.
- Process: Stripping old finish, sanding to bare wood, applying stain, and then applying multiple coats of a protective topcoat (polyurethane, varnish).
Cabinet Door Replacement (Professional Installation)
- Pros: Professional results, wide variety of options, less DIY hassle.
- Cons: More expensive than DIY refacing or painting.
- Process: A company measures, manufactures, and installs new doors and drawer fronts, often applying veneer to the cabinet boxes as well.
Common Challenges and How to Overcome Them
Challenge: Uneven Surfaces After Veneering
- Solution: Ensure your cabinet boxes are clean and smooth before applying veneer. Use a good quality adhesive and a roller or squeegee to press out air bubbles and ensure full contact. Trim excess veneer carefully with a very sharp blade.
Challenge: Doors Not Hanging Straight
- Solution: This is usually an issue with hinge adjustment. Most modern cabinet hinges have three adjustment screws. Experiment with these screws to move the door up/down, in/out, and left/right until it aligns perfectly with its neighbors. Ensure your initial hinge holes were drilled accurately.
Challenge: Mismatched Colors/Finishes
- Solution: Order all your doors, drawer fronts, and veneer from the same supplier or batch if possible. If you’re painting the cabinet boxes, get a sample of your new door color and try to match the paint as closely as possible.
Challenge: Overwhelmed by the Process
- Solution: Break the project down into smaller, manageable steps. Tackle one cabinet box or a few doors at a time. Watch plenty of tutorial videos and read detailed guides. Don’t rush the process.
Frequently Asked Questions (FAQ)
Q1: How much does it cost to reface kitchen cabinets?
A: The cabinet refacing cost for DIY is primarily the cost of materials, which can range from $1000 to $3000 for a small to medium-sized kitchen. Professional refacing typically costs between $3,000 and $7,000 or more.
Q2: Can I reface cabinets with laminate doors?
A: Yes, laminate cabinet doors are a popular and durable option for refacing. They are easy to clean and come in many styles and finishes.
Q3: How do I measure for cabinet doors?
A: Measure the width and height of your existing doors and drawer fronts. Note whether your cabinets have a full overlay, partial overlay, or inset style. It’s often best to order new doors that are slightly larger than your current ones to achieve a full overlay look, but confirm specifications with your supplier.
Q4: Is cabinet refacing a good DIY project?
A: Yes, cabinet refacing is a very achievable DIY project for those with basic carpentry and DIY skills. Careful planning, accurate measuring, and patience are key to success.
Q5: What’s the difference between refacing and resurfacing cabinets?
A: While often used interchangeably, “refacing” typically refers to replacing doors and drawer fronts and applying new veneer to the existing cabinet boxes. “Resurfacing” can sometimes refer to painting or staining the existing doors and boxes without replacement.
Q6: Can I paint my existing cabinet doors instead of refacing?
A: Yes, cabinet painting is a popular alternative. However, it requires extensive preparation (cleaning, sanding, priming) for a durable finish, and the results may not be as long-lasting or smooth as new doors.
Q7: What kind of hardware should I choose for my refaced cabinets?
A: The cabinet hardware upgrade is a great way to personalize your kitchen. Choose knobs, pulls, or handles that match your new door style and your overall kitchen aesthetic. Consider the finish (brushed nickel, matte black, brass) and the style (modern, traditional, transitional).
Q8: How long does DIY cabinet refacing take?
A: The time it takes varies greatly depending on your skill level, the size of your kitchen, and how much time you dedicate to it. It can range from a weekend for a small set of cabinets to several weeks if you’re working part-time.
By following these steps and tips, you can successfully reface your kitchen cabinets and enjoy a beautiful, updated kitchen!