
Can you install kitchen units yourself? Yes, you absolutely can! With the right tools, preparation, and a bit of patience, DIY kitchen units are achievable. This comprehensive kitchen installation guide will walk you through every step of fitting kitchen cupboards and mounting kitchen cabinets, ensuring a professional finish for your DIY kitchen units. We’ll cover everything from planning and preparation to the actual kitchen cabinet installation, making the process of fixing kitchen units straightforward.
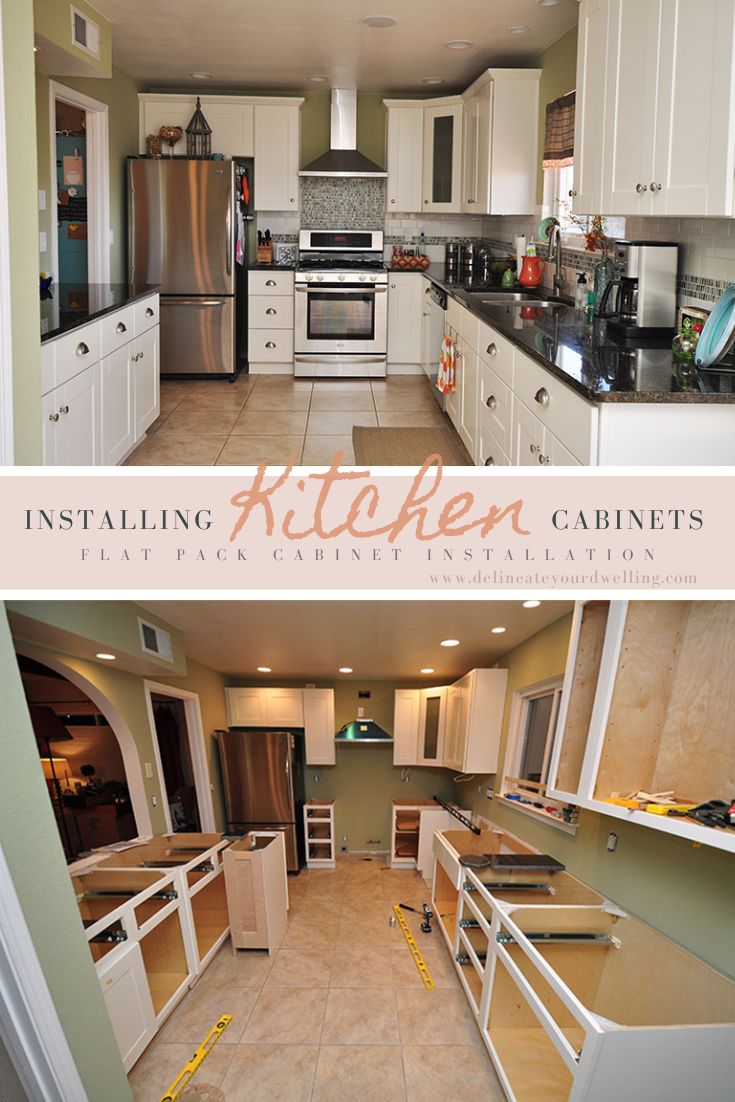
Image Source: www.delineateyourdwelling.com
1. Planning Your Kitchen Unit Layout
Before you even think about screws or spirit levels, meticulous planning is key to successful kitchen unit assembly. This stage is crucial for a smooth kitchen installation process and a beautiful, functional end result.
1.1 Measuring Your Space
- Measure Twice, Cut Once: This old adage is paramount in kitchen fitting. Measure the length, width, and height of every wall where cabinets will be installed.
- Note Obstructions: Mark the location of windows, doors, existing plumbing, electrical outlets, and switches. Measure the distance from corners to these features.
- Ceiling Height Variations: Check for any unevenness in ceiling heights or wall straightness. Even small discrepancies can affect how your wall cabinets sit.
1.2 Creating a Layout Plan
- Graph Paper is Your Friend: Sketch out your kitchen on graph paper, using a scale (e.g., 1 inch = 1 foot).
- Cabinet Placement: Draw in your base cabinets and wall cabinets, noting their dimensions. Consider the workflow:
- The Kitchen Work Triangle: Ideally, the sink, refrigerator, and hob should form a triangle with clear pathways between them.
- Appliance Placement: Think about where your oven, dishwasher, and washing machine will go. Ensure there’s enough clearance for doors to open fully.
- Countertop Space: Aim for continuous work surfaces, especially between the sink and hob.
- Marking Key Features: Indicate the positions of sinks, hobs, ovens, extractor fans, and any built-in appliances.
- Door Swings: Show the direction that cabinet and appliance doors will open. Ensure they don’t collide or block essential pathways.
1.3 Choosing Your Units
- Stock vs. Bespoke: Decide whether to use standard pre-assembled units or custom-made ones. Pre-assembled units speed up the DIY kitchen units process.
- Unit Types:
- Base Cabinets: These sit on the floor and support your countertops.
- Wall Cabinets: These are mounted to the wall, providing overhead storage.
- Tall Cabinets: Often used for ovens, pantries, or integrated appliances.
- Specialty Cabinets: Corner units, drawer units, appliance housings.
- Unit Dimensions: Ensure the dimensions of your chosen units fit your planned layout and measurements. Standard base cabinet depths are usually around 560-600mm, and wall cabinet depths are around 300-350mm.
2. Gathering Your Tools and Materials
Having the right tools makes fitting kitchen cupboards a much more manageable task. Investing in quality tools will not only make the job easier but also ensure a better finish for your kitchen cabinet installation.
2.1 Essential Tools
- Measuring Tape: A good quality, long tape measure is vital.
- Spirit Level: Essential for ensuring your cabinets are perfectly horizontal and vertical. A longer level (1m or more) is better for checking longer runs of cabinets.
- Pencil: For marking guidelines on walls and cabinets.
- Drill/Driver: With various drill bits (wood, masonry) and screwdriver bits.
- Screwdrivers: Both Phillips and flathead, in various sizes.
- Hammer: For tapping in wall plugs if needed.
- Saw: A handsaw, jigsaw, or circular saw for any necessary adjustments to cabinetry or plinths.
- Clamps: To hold units together while you fix them.
- Chisels: For minor adjustments or to create recesses.
- Stud Finder: To locate wall studs for secure mounting of kitchen cabinets.
- Plasterboard Rawl Plugs/Wall Anchors: For securing cabinets to plasterboard walls if studs aren’t available. Use appropriate fixings for your wall type (brick, plasterboard, etc.).
- Countersink Bit: To create a recess for screw heads so they sit flush.
- Utility Knife: For scoring plasterboard or opening packaging.
- Safety Glasses: Crucial for protecting your eyes from dust and debris.
- Dust Mask: To avoid inhaling dust.
- Work Gloves: For grip and protection.
- Miter Saw (Optional but Recommended): For precise cuts on plinths and cornices.
2.2 Key Materials
- Kitchen Cabinets: Your chosen base, wall, and tall units.
- Screws: Appropriate wood screws for assembling and fixing units.
- Wall Fixings: Wall plugs, heavy-duty anchors, or toggle bolts depending on your wall type.
- Cabinet Joining Screws (Dowel Screws/Cam Locks): If your units require assembly, these will be supplied or need to be purchased.
- Spirit Leveling Shims: Small wooden or plastic wedges to level cabinets on uneven floors.
- Plinths: The boards that run along the bottom of your base cabinets.
- Cornices/Pelmets: Decorative mouldings for the top of wall cabinets.
- Worktops: Ready for installation.
- Adhesive: For fixing plinths, cornices, or worktops (if specified).
- Caulk/Sealant: For sealing gaps and creating a neat finish.
3. Assembling Your Kitchen Units
Many modern DIY kitchen units come flat-packed, requiring assembly before the actual kitchen cabinet installation. This section details the common steps involved in kitchen unit assembly.
3.1 Following Manufacturer Instructions
- Read Them First: Always start by reading the manufacturer’s instructions carefully. Each brand may have slightly different assembly methods.
- Identify Components: Lay out all parts and hardware and check them against the parts list. Ensure nothing is missing or damaged.
3.2 Common Assembly Steps
- Prepare the Cabinets: Lay the cabinet panels out on a protected surface (like the packaging cardboard).
- Attach Fittings: Insert dowels and cam locks into the pre-drilled holes as per the instructions.
- Assemble the Carcass: Connect the side panels, base, and top panels to form the cabinet box. Ensure all joints are tight and flush.
- Attach the Back Panel: Slide or nail the thin back panel into place. This adds rigidity and squareness to the unit. Use small nails or screws, being careful not to split the wood.
- Install Drawer Runners and Hinges: Fit the runners for drawers and the hinges for doors onto the cabinet carcass according to the pre-drilled holes. Pay close attention to the orientation of these fittings.
Table 1: Common Kitchen Unit Components & Their Function
| Component | Function |
|---|---|
| Carcass | The main box structure of the cabinet. |
| Base Panel | The bottom part of the cabinet. |
| Side Panels | The vertical sides of the cabinet. |
| Top Panel | The top part of the cabinet. |
| Back Panel | Provides rigidity and squareness to the cabinet. |
| Drawer Runners | Allow drawers to slide in and out smoothly. |
| Hinges | Attach doors to the cabinet and allow them to open/close. |
| Cam Locks | Rotating fasteners that tighten connections between panels. |
| Dowels | Small wooden or plastic pegs that align and strengthen joints. |
4. Installing Base Cabinets: The Foundation
Installing base cabinets correctly is fundamental to fitting kitchen cupboards, as they provide the stable base for your worktops and kitchen.
4.1 Preparing the Floor and Walls
- Check for Levelness: Use your spirit level to check the floor. If it’s significantly uneven, you’ll need to use shims to level the cabinets.
- Marking the Plinth Line: Decide on the finished height of your base cabinets (typically around 870mm to the top of the worktop). Measure up from the floor and draw a level line using your spirit level and pencil. This is where the top of your plinth will sit.
4.2 Positioning and Levelling the First Cabinet
- Start in a Corner: It’s usually easiest to start with a corner unit or a cabinet against a wall.
- Place the Cabinet: Position the first base cabinet against the wall, aligning its top edge with your marked plinth line.
- Shim as Needed: Place shims underneath the cabinet to bring its top edge level with your guideline. Check for levelness front-to-back and side-to-side.
- Check for Plumb: Use your spirit level to ensure the cabinet sides are perfectly vertical (plumb). Adjust shims as necessary.
4.3 Fixing Base Cabinets to the Wall
- Locate Studs: Use a stud finder to locate wall studs. These are the strongest fixing points.
- Mark Fixing Points: With the cabinet perfectly positioned and levelled, mark through the cabinet’s top back edge (or designated fixing points) onto the wall, ideally at stud locations.
- Drill Pilot Holes: Drill pilot holes into the wall studs.
- Secure the Cabinet: Drive long screws through the cabinet carcass and into the wall studs. Ensure the cabinet remains level as you tighten.
4.4 Joining Multiple Base Cabinets
- Position Adjacent Cabinet: Bring the next base cabinet alongside the first one.
- Level and Shim: Level and shim this second cabinet, ensuring its top edge is flush with the first.
- Clamp Together: Use clamps to pull the two cabinets tightly together at the front and back edges.
- Join with Screws: Drill pilot holes through the side panels of the cabinets where they meet. Use cabinet joining screws (often called carcase screws or connector bolts) to fix them securely. These are designed for joining units and provide a strong, flush connection. Aim for at least two fixing points per join, one near the top and one near the bottom.
- Repeat: Continue this process for all base cabinets, working your way along the wall. Always check for levelness and plumb as you go.
4.5 Fitting Plinths
- Measure and Cut: Measure the length of the front of your base cabinets. Cut plinths to size, mitreing corners if necessary for a neat finish.
- Attach Plinths: Plinths can be fixed with screws from the inside of the cabinet, or using clips or adhesive. Ensure they are flush with the front of the cabinets.
5. Installing Wall Cabinets: Reaching New Heights
Mounting kitchen cabinets requires precision and often a second pair of hands. This is where careful planning and secure fixing are most critical.
5.1 Preparing the Walls
- Marking the Cabinet Height: Decide on the desired height for your wall cabinets. A common gap between the worktop and wall cabinets is 450mm to 500mm. Measure up from the top of the base cabinets or worktop and draw a level line around the room. This will be the bottom edge of your wall cabinets.
- Locate Studs and Joists: Use your stud finder to mark the positions of wall studs or ceiling joists. These are essential for securely mounting kitchen cabinets.
- Consider Weight: Remember that wall cabinets will be loaded with items, so secure fixing is paramount.
5.2 Fitting Wall Cabinet Support Battens (Optional but Recommended)
- Extra Security: For added security, especially if your wall stud placement isn’t ideal, consider fitting a sturdy wooden batten (e.g., 2×2 inch timber) along your marked cabinet height line, screwing it securely into the wall studs or joists. This provides a very strong surface to attach the cabinets to.
5.3 Positioning and Levelling the First Wall Cabinet
- Start in a Corner: Similar to base cabinets, it’s best to begin with a corner unit or a cabinet against a wall.
- Lift and Position: Lift the first wall cabinet into position, aligning its bottom edge with your marked guideline.
- Use Support: It’s highly recommended to have someone help you lift and hold the cabinet, or use adjustable cabinet support poles.
- Shim and Level: Use shims behind the cabinet where it meets the wall to ensure it is perfectly plumb (vertical) and level (horizontal). Check from all angles.
5.4 Fixing Wall Cabinets to the Wall
- Mark Fixing Points: Mark through the pre-drilled holes in the cabinet’s top and bottom rails onto the wall, ensuring you are hitting studs or your support batten.
- Drill Pilot Holes: Drill appropriate pilot holes into the wall studs or batten.
- Secure the Cabinet: Drive long screws through the cabinet and into the wall. Ensure the cabinet remains level and plumb as you tighten. Don’t overtighten, as this can damage the cabinet.
5.5 Joining Multiple Wall Cabinets
- Position Adjacent Cabinet: Bring the next wall cabinet into place next to the first.
- Level and Shim: Level and shim the second cabinet so its bottom edge is aligned with the first, and it is plumb.
- Clamp Together: Clamp the two cabinets tightly together along the joining edges.
- Join with Screws: Drill pilot holes through the cabinet frames and join them using cabinet joining screws. Again, aim for at least two fixing points.
5.6 Fitting Cornices and Pelmets
- Measure and Cut: Measure the top front edge of your wall cabinets. Cut cornices or pelmets to length, mitring corners for a seamless look.
- Attach: These are typically fixed with screws from the inside of the cabinet or with adhesive.
6. Final Touches and Adjustments
Once all your kitchen units are fixed in place, a few finishing steps will give your DIY kitchen units a truly professional look.
6.1 Installing Doors and Drawers
- Attach Doors: Screw the doors onto the hinges already fitted to the cabinets.
- Adjust Hinges: Most hinges have adjustment screws that allow you to fine-tune the door alignment. Adjust until all doors hang straight, are evenly spaced, and close properly.
- Fit Drawer Fronts: Attach drawer fronts to the assembled drawer boxes.
- Install Handles/Knobs: Measure and mark the positions for handles or knobs, then drill and attach them.
6.2 Fitting Worktops
- Measure and Cut: Measure your base cabinets and cut your worktops to size. Remember to factor in overhangs at the front and any appliance cut-outs.
- Dry Fit: Place the worktops on the base cabinets to check the fit and alignment.
- Secure Worktops: Worktops are usually secured from underneath by screwing through the top edges of the base cabinets into the worktop. Use appropriate length screws that won’t go through the top surface of the worktop. Some worktops also require adhesive.
6.3 Sealing and Finishing
- Seal Gaps: Use caulk or sealant to fill any small gaps between cabinets and walls, or around pipes.
- Clean Up: Wipe down all surfaces to remove dust and fingerprints.
7. Frequently Asked Questions (FAQ)
Q1: How do I ensure my kitchen cabinets are level?
A1: Use a spirit level on the top of each cabinet. Shim underneath the cabinet base until the bubble in the level is centered. Also, check that the cabinet is plumb (vertically straight) against the wall.
Q2: What is the best way to fix wall cabinets?
A2: The most secure method is to fix them directly into wall studs or ceiling joists using long, strong screws. If studs are not available, use heavy-duty plasterboard fixings rated for the weight of the cabinets and their contents. A supporting batten screwed into studs provides an excellent anchor point.
Q3: Can I install kitchen units myself if I’m a beginner?
A3: Yes, with careful planning, patience, and the right tools, it’s a very achievable DIY project. Start with a simpler layout if you’re new to this.
Q4: How do I join two base cabinets together?
A4: Position them tightly side-by-side, ensure they are level and plumb, clamp them together, then drill pilot holes through the cabinet carcasses and secure them with dedicated cabinet joining screws.
Q5: What is kitchen cupboard fitting?
A5: Kitchen cupboard fitting refers to the entire process of installing kitchen cabinets, from assembling them to securely mounting them on the walls and floor, and attaching doors and drawers.
Q6: How far apart should wall cabinets be from base cabinets?
A6: Typically, there is a gap of 450mm to 500mm between the top of the base cabinets (or worktop) and the bottom of the wall cabinets. This provides ample working space.
Q7: What screws should I use for fixing cabinets to the wall?
A7: For fixing into solid walls (brick or block), use appropriate masonry screws with wall plugs. For timber-framed walls, use long wood screws (e.g., 70-100mm) that will go through the cabinet carcass and securely into the studs. Always ensure the screws are long enough to penetrate well into the stud.
Conclusion
Embarking on a DIY kitchen unit installation might seem daunting, but by following this detailed kitchen installation guide, you can confidently tackle the task. From the initial planning and kitchen unit assembly to the precise work of mounting kitchen cabinets and fitting kitchen cupboards, each step contributes to a successful outcome. Remember to prioritize accuracy, use the right fixings, and take your time. With careful execution of installing base cabinets and installing wall cabinets, your DIY kitchen units will look as though they were installed by a seasoned professional. Happy fixing!