
Can you build your own kitchen island? Absolutely! This guide will show you how to make a kitchen island, transforming your kitchen into a more functional and stylish space. We’ll cover everything from initial planning to the final touches, helping you create a custom kitchen island that perfectly suits your needs.
Building a kitchen island is a rewarding DIY project that can significantly enhance your kitchen’s utility and aesthetic. Whether you’re looking for extra prep space, a casual dining area, or simply more storage, a DIY kitchen island is a fantastic solution. This comprehensive guide will walk you through the entire process, from choosing your design and materials to the final installation. We’ll delve into kitchen island dimensions, kitchen island plans, and how to incorporate features like kitchen island seating or a butcher block kitchen island. If you’re planning a kitchen island remodel, this guide will be your best friend.
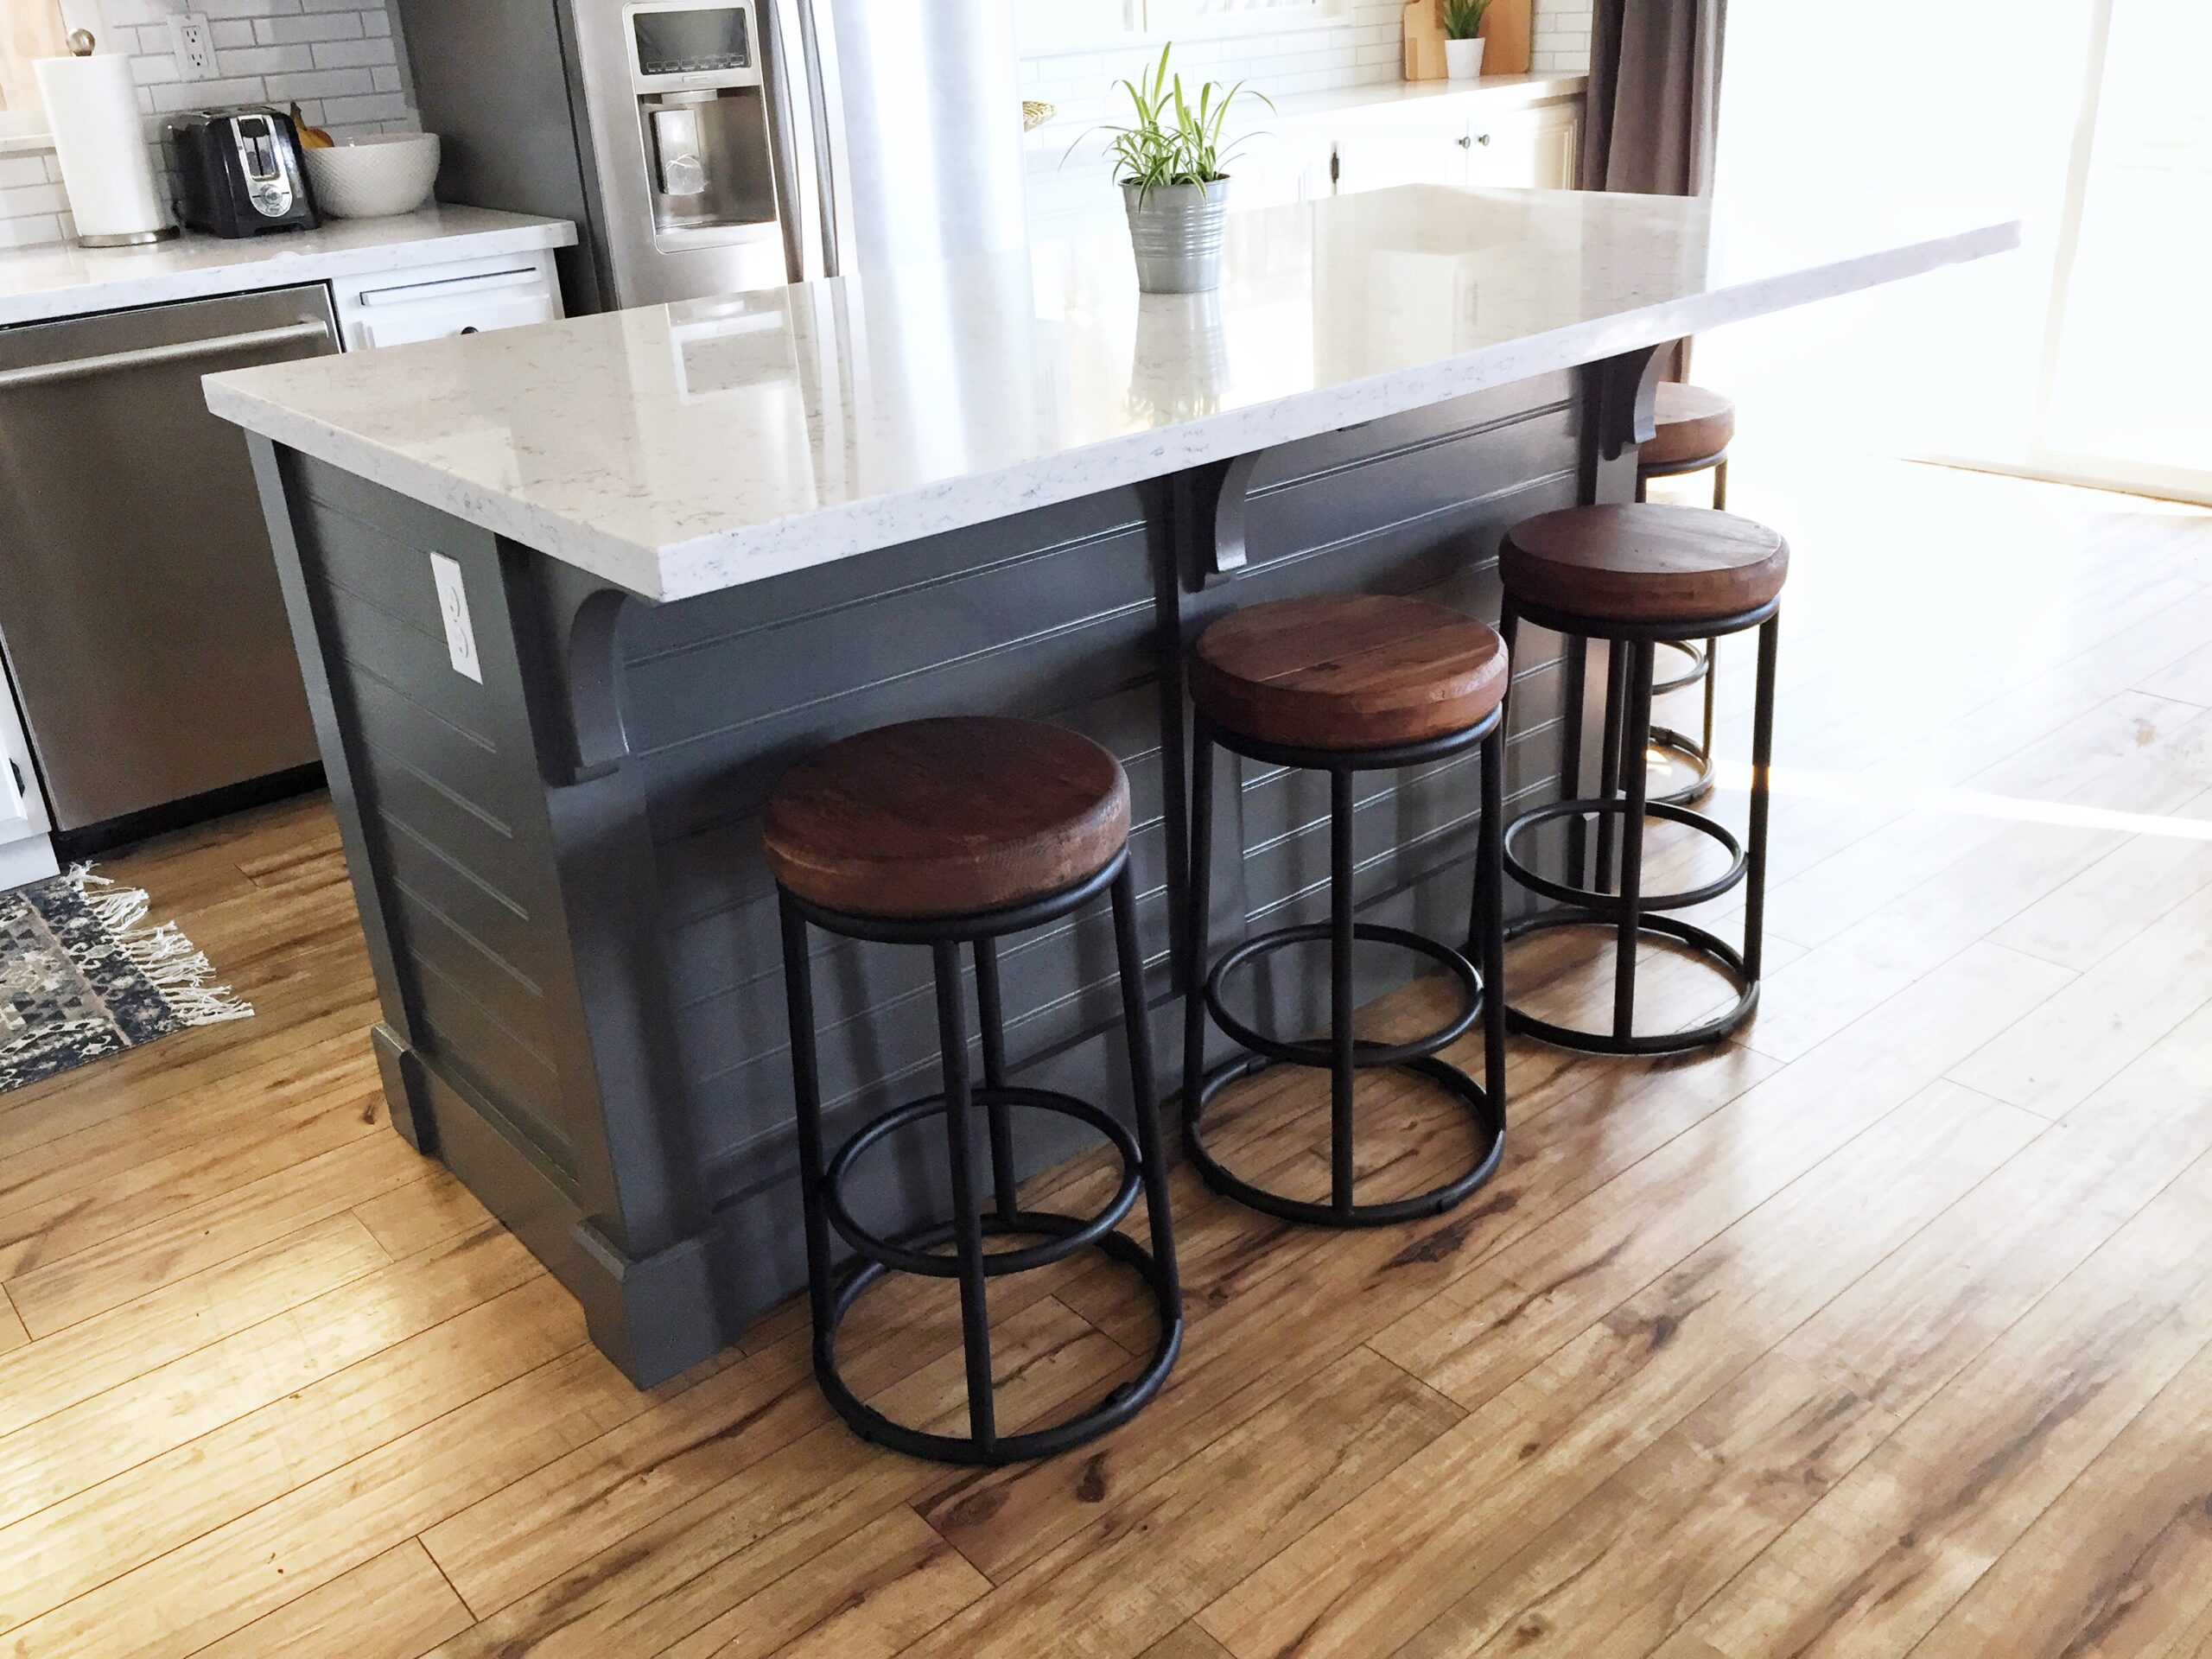
Image Source: domesticblonde.com
Deciphering Your Kitchen Island Needs
Before you grab your tools, it’s crucial to figure out exactly what you want and need from your new kitchen island. Think about how you use your kitchen most.
Purpose and Functionality
- Prep Space: Do you need more room to chop vegetables, mix dough, or assemble meals?
- Storage: Are you looking for cabinets, drawers, or shelves to organize kitchen gadgets, cookware, or pantry staples?
- Seating: Would you like a place for quick breakfasts, snacks, or for guests to chat while you cook? This means planning for kitchen island seating.
- Appliance Hub: Do you want to integrate a cooktop, sink, or dishwasher? This will require more complex plumbing and electrical work.
- Aesthetic: What style are you going for? Modern, rustic, farmhouse? The look of your island should complement your existing kitchen décor.
Space Assessment
- Measure Your Kitchen: Accurately measure the available space where the island will go. Consider walkways around the island. You’ll need at least 36 inches of clearance on all sides for comfortable movement.
- Traffic Flow: Ensure the island doesn’t block essential pathways or doorways.
Budget
- Material Costs: Prices vary significantly for wood, countertops, hardware, and finishes.
- Tool Costs: If you don’t have them already, you might need to invest in certain tools.
- Contingency: Always add 10-15% to your budget for unexpected expenses.
Designing Your Dream Kitchen Island
With your needs clear, it’s time to bring your vision to life through design. This is where you’ll make crucial decisions about the size, shape, and features of your custom kitchen island.
Choosing a Style
The style of your kitchen island can be a focal point or a subtle addition. Consider these popular options:
- Freestanding Kitchen Island: These are the most common DIY options. They offer flexibility and can be moved if needed. A freestanding kitchen island is a great starting point for many projects.
- Cabinet-Based Island: This involves using pre-made cabinets as the base, which can simplify construction. You can arrange base cabinets in various configurations to create your desired kitchen island cabinet structure.
- Table-Style Island: A simpler design often resembling a large dining table, sometimes with a butcher block top. A butcher block kitchen island offers a warm, natural look and is excellent for food preparation.
- Rolling Island: For ultimate flexibility, a rolling island can be moved where needed.
Kitchen Island Plans and Dimensions
When planning, kitchen island dimensions are critical. A standard island is typically 2-3 feet deep and 4-6 feet long.
Table 1: Recommended Kitchen Island Dimensions
| Feature | Minimum Recommended | Ideal |
|---|---|---|
| Width | 24 inches (for narrow spaces) | 36-48 inches |
| Length | 48 inches (for basic prep) | 60-84 inches (allows for seating or appliances) |
| Height | 30-36 inches (standard countertop height) | 36 inches (for prep work); 42 inches (for bar seating) |
| Clearance | 36 inches (walkway around the island) | 42-48 inches (more comfortable traffic flow) |
| Seating Overhang | 10-12 inches (for counter-height seating) | 12-15 inches (for comfortable legroom) |
Your kitchen island plans should also detail:
- Shape: Rectangular, square, L-shaped, or U-shaped.
- Countertop Material: Granite, quartz, butcher block, laminate, concrete, or stainless steel.
- Storage Solutions: Number and type of drawers, cabinets, open shelving.
- Appliance Integration: Placement for cooktops, sinks, dishwashers, wine fridges.
- Electrical Outlets: Essential for powering appliances and devices.
For those new to DIY, finding pre-made kitchen island plans online or in woodworking magazines can be a great starting point. You can adapt these plans to your specific needs.
Gathering Materials and Tools
Once your design is finalized, it’s time to collect everything you’ll need to build a kitchen island.
Essential Materials
- Framing Lumber: 2x4s or 2x6s for the island’s base structure.
- Plywood: 3/4-inch plywood for cabinet bases, drawer boxes, and potentially the countertop substrate.
- MDF or Hardwood Panels: For cabinet doors, drawer fronts, and decorative trim.
- Countertop Material: Your chosen material (e.g., butcher block, granite slab, quartz).
- Hardware: Hinges, drawer slides, knobs, pulls.
- Fasteners: Wood screws, wood glue, nails.
- Finishing Supplies: Primer, paint or stain, sealant, sandpaper.
- Electrical Supplies (if needed): Wire, outlets, junction boxes.
- Plumbing Supplies (if needed): Pipes, fittings, faucet, sink.
Necessary Tools
- Measuring Tape: For accurate measurements.
- Pencil: For marking.
- Safety Glasses and Gloves: Always prioritize safety.
- Circular Saw or Miter Saw: For cutting lumber and plywood.
- Jigsaw: For cutting curves or openings (e.g., for sinks).
- Drill/Driver: For drilling pilot holes and driving screws.
- Sander (Orbital or Belt): For smoothing surfaces.
- Level: To ensure everything is plumb and level.
- Clamps: To hold pieces together while glue dries or during assembly.
- Carpenter’s Square: For ensuring right angles.
- Caulking Gun and Caulk: For sealing gaps.
- Putty Knife: For applying wood filler or caulk.
- Paintbrushes or Rollers: For applying finishes.
Building the Island’s Base Structure
The foundation of your DIY kitchen island is its structural frame. This needs to be sturdy and perfectly square.
Constructing the Frame
- Cut Lumber: Based on your kitchen island plans, cut your 2x4s or 2x6s to the required lengths for the base perimeter and any internal supports.
- Assemble the Base: Create a rectangular frame for the bottom of your island. Use wood glue and screws for strong joints. Ensure the corners are square using a carpenter’s square.
- Add Internal Supports: Install vertical studs or crossbeams within the frame to provide support for the countertop and any internal shelving or cabinet dividers. Plan these supports based on where cabinets, drawers, and countertop overhangs will be.
- Build the Top Frame: Create another frame identical to the base frame. This will support the countertop.
- Attach Plywood Substrate (Optional): If your countertop requires it (like for tile or some laminate), attach a layer of 3/4-inch plywood to the top frame.
Incorporating Cabinet and Drawer Boxes
You have a few options for the cabinet and drawer components:
- Build from Scratch: This offers the most customization but requires advanced woodworking skills. You’ll build individual cabinet boxes and drawer boxes using plywood.
- Use Stock Cabinet Bases: Purchase pre-made base cabinets from a home improvement store. These can be arranged and connected to form the island structure. This is a faster and often easier route for a kitchen island cabinet build.
- Modular Systems: Some companies offer modular island components that can be assembled.
Steps for Building Cabinet Boxes (if not using stock cabinets):
- Cut Plywood: Cut pieces for the sides, top, bottom, and back of each cabinet box.
- Assemble Boxes: Use wood glue and screws to assemble the boxes. Ensure they are square.
- Install Drawer Slides: Attach drawer slides to the inside of the cabinet boxes and the sides of the drawer boxes according to the manufacturer’s instructions.
- Build Drawer Boxes: Construct drawer boxes using 1/2-inch or 3/4-inch plywood. Use dado joints or screws for strength.
Attaching Plywood Sheathing
Once the frame and cabinet boxes are in place, you’ll sheath the sides and back of the island with plywood (usually 1/2-inch or 3/4-inch).
- Measure and Cut: Measure the areas to be covered and cut the plywood to fit precisely.
- Attach Plywood: Apply wood glue to the frame and attach the plywood panels using screws or finishing nails. Ensure the edges are flush.
Adding Doors, Drawers, and Countertops
This stage brings your DIY kitchen island to life, adding functionality and its signature look.
Installing Doors and Drawer Fronts
- Prepare Doors/Fronts: If you built custom doors and drawer fronts, sand them smooth and apply your chosen finish (paint or stain).
- Attach Hinges/Slides: Install hinges on the cabinet doors and attach the drawer fronts to the drawer boxes.
- Mount Doors and Drawers: Attach the doors to the cabinet boxes using the hinges. Slide the drawers into place. Adjust hinges and slides for proper alignment and smooth operation.
Installing the Countertop
The countertop is a significant element. The installation method depends heavily on the material.
-
Butcher Block Kitchen Island:
- Measure and Cut: Measure your island base and cut the butcher block to size, adding any desired overhang.
- Sand and Seal: Thoroughly sand the butcher block, starting with a coarse grit and moving to finer grits. Apply several coats of food-safe mineral oil or a specialized butcher block sealant, allowing it to dry between coats.
- Attach: Secure the butcher block to the island frame from underneath using screws or figure-8 fasteners to allow for wood expansion and contraction.
-
Granite, Quartz, or Laminate:
- Measure and Template: Professional installers usually measure and template stone countertops. For laminate, you can often do this yourself.
- Secure: These countertops are typically attached by screwing up through the top frame of the island or by using specialized adhesive. Ensure there are no gaps between the countertop and the island structure.
Adding Backsplash and Trim
- Backsplash: If your design includes a backsplash, install it now. This could be tile, stone, or a continuation of your countertop material.
- Trim and Details: Add decorative trim, molding, or baseboards to enhance the appearance and cover any rough edges.
Finishing Touches for a Polished Look
The final steps are crucial for both aesthetics and durability.
Sanding and Preparation
- Smooth Surfaces: Before painting or staining, give the entire island a final sanding with a fine-grit sandpaper (180-220 grit).
- Clean Thoroughly: Wipe down the entire island with a tack cloth or damp cloth to remove all dust.
Painting or Staining
- Primer: Apply one or two coats of primer, especially if you’re painting.
- Paint/Stain: Apply your chosen paint or stain according to the manufacturer’s instructions. For durability, consider using a high-quality cabinet paint or a durable wood stain. Multiple thin coats are better than one thick coat.
- Top Coat/Sealant: Apply a protective top coat (polyurethane, lacquer, or a durable varnish) to protect the finish from wear and tear, especially if it’s a high-traffic area.
Installing Hardware
- Knobs and Pulls: Install your chosen knobs and pulls on cabinet doors and drawer fronts. Measure carefully to ensure they are aligned.
Electrical and Plumbing (Advanced Steps)
If your custom kitchen island includes these features, this is the time to connect them. This stage requires significant expertise and should ideally be done by or with a licensed electrician and plumber.
- Electrical: Run wiring from your home’s electrical panel to the island. Install outlets and ensure all connections are safe and up to code.
- Plumbing: Connect the sink and faucet to your home’s water supply and drain lines.
Maintaining Your DIY Kitchen Island
Proper care will ensure your island remains beautiful and functional for years to come.
- Cleaning: Clean spills immediately. Use appropriate cleaners for your countertop material.
- Butcher Block Care: Reapply mineral oil or sealant periodically to prevent drying and cracking.
- Hardware: Tighten loose knobs and pulls as needed.
- Finish: Touch up any chips or scratches promptly.
Frequently Asked Questions About Building a Kitchen Island
Q1: How much does it cost to build a kitchen island?
A: The cost can vary greatly depending on the size, materials, and complexity of the design. Simple islands can cost a few hundred dollars for materials, while more elaborate custom islands with premium countertops and integrated appliances can run into thousands.
Q2: How much space do I need for a kitchen island?
A: You need at least 36 inches of clearance around the island for comfortable traffic flow. 42-48 inches is even better, especially if you plan to have seating or multiple people moving around the kitchen.
Q3: Can I put a sink or cooktop in my DIY kitchen island?
A: Yes, but this significantly increases the complexity of the project, requiring plumbing and electrical work. It’s advisable to consult with or hire professionals for these aspects to ensure safety and compliance with building codes.
Q4: What’s the easiest way to build a kitchen island?
A: Using pre-made base cabinets as the foundation for your island is often the easiest and fastest DIY approach. You can then customize the countertop, backsplash, and hardware.
Q5: What type of wood is best for a butcher block kitchen island?
A: Hardwoods like maple, oak, and walnut are excellent choices for butcher block countertops due to their durability and density. Maple is a very popular and relatively affordable option.
Q6: How do I ensure my island is level?
A: Use a level throughout the construction process. Shim the base of the island if your floor is uneven before permanently attaching it, or if it’s a freestanding kitchen island, use adjustable feet.
Q7: What is a good height for kitchen island seating?
A: For standard counter-height stools (around 24-26 inches tall), a 36-inch tall island is perfect. For bar-height stools (around 30-32 inches tall), aim for a 40-42 inch island height, with at least 10-12 inches of countertop overhang for legroom.
Building a kitchen island is a project that can truly elevate your kitchen. By carefully planning, gathering the right materials, and following these steps, you can successfully build a kitchen island that enhances both the functionality and beauty of your home. Whether you’re undertaking a full kitchen island remodel or simply adding a new feature, a DIY kitchen island is a achievable and rewarding endeavor.