
Can you replace a kitchen sink sprayer yourself and save money? Absolutely! Learning how to replace a kitchen sink sprayer, often referred to as a kitchen faucet sprayer replacement, is a fantastic DIY project that can save you money on plumber’s fees and extend the life of your faucet. This guide will walk you through the entire process, from identifying the problem to having your new sprayer working perfectly. We’ll cover everything you need to know about how to change sink sprayer parts, including sink sprayer hose replacement and how to install new kitchen sprayer units.
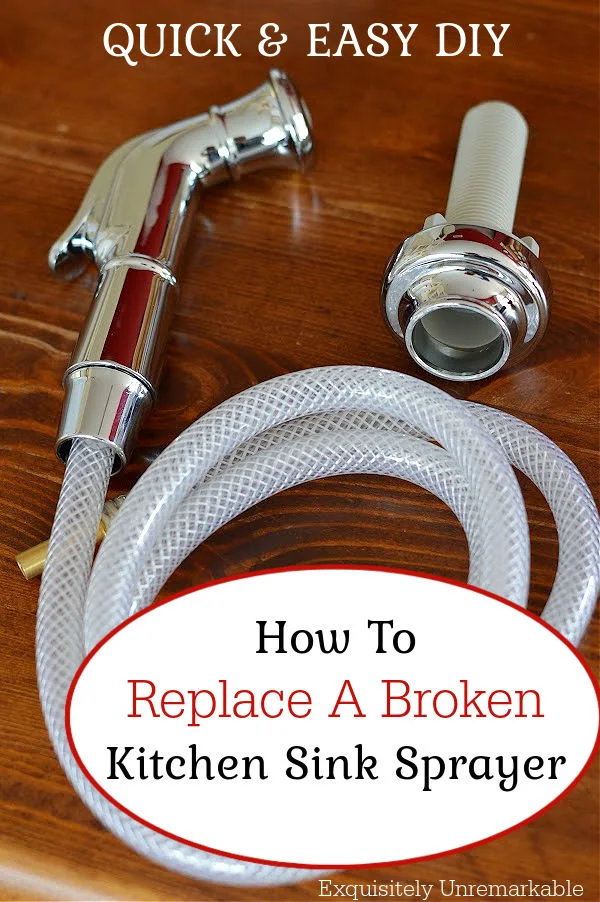
Image Source: blogger.googleusercontent.com
Why Replace Your Kitchen Sink Sprayer?
Over time, your kitchen sink sprayer can suffer from a variety of issues. The most common culprits are leaks, reduced water pressure, or a complete failure to spray. Sometimes, the sprayer head itself can become clogged with mineral deposits, leading to an uneven or weak spray pattern. Other times, the hose might develop cracks or kinks, causing leaks under the sink or a compromised spray function. Addressing these problems promptly can prevent water damage and restore the convenience and functionality of your kitchen sink. A leaky sink sprayer fix is often much simpler and cheaper than replacing the entire faucet.
Common Sprayer Problems:
- Leaks: Water dripping from the sprayer head, the hose connection, or under the sink.
- Low Pressure: The spray is weak or doesn’t have the force it used to.
- No Spray: The sprayer doesn’t activate at all, or only the main faucet stream works.
- Clogged Nozzle: Water sprays unevenly or in a broken pattern.
- Damaged Hose: Visible cracks, kinks, or fraying on the sprayer hose.
Gathering Your Supplies
Before you begin, it’s crucial to have all the necessary tools and parts on hand. This will make the process smoother and prevent frustrating trips to the hardware store.
Tools You’ll Need:
- Adjustable Wrench or Basin Wrench: For loosening and tightening nuts. A basin wrench is particularly useful for reaching nuts in tight spaces under the sink.
- Pliers: For gripping and turning various components.
- Screwdriver Set: Both Phillips and flathead screwdrivers might be needed for certain connections or mounting brackets.
- Bucket or Towels: To catch any residual water that may drain from the pipes.
- Safety Glasses: To protect your eyes from falling debris or water splashes.
- Work Gloves: For a better grip and to protect your hands.
- Flashlight or Headlamp: Essential for seeing clearly in the often-dim space under the sink.
- Thread Seal Tape (Teflon Tape): For ensuring watertight seals on threaded connections.
- Utility Knife or Box Cutter: For cutting old hoses or packaging.
Parts You’ll Need:
- New Kitchen Sink Sprayer Head: If the issue is with the spray pattern or the head itself.
- New Sprayer Hose: If the existing hose is damaged or leaking.
- New Sprayer Hose Weight: Some hoses come with a new weight, but it’s good to have one if yours is missing or broken.
- New Sprayer Connection Nut: Sometimes the plastic nut that connects the hose to the faucet body can crack.
- Diverter Valve (Optional): In some faucet designs, a diverter valve controls the flow of water between the main faucet and the sprayer. If this is the source of your problem, you might need to replace it.
Tip: It’s often best to purchase a complete kitchen faucet sprayer replacement kit if you’re unsure which part is failing. These kits typically include the sprayer head, hose, and sometimes the necessary connections.
Step-by-Step Guide: How to Replace Kitchen Sink Sprayer
This detailed guide will help you successfully replace your kitchen sink sprayer. We’ll break down each step to make it easy to follow, ensuring you can confidently tackle this DIY project.
Step 1: Turn Off the Water Supply
This is the most critical first step to prevent flooding.
Locating the Shut-Off Valves:
- Look under your kitchen sink. You should see two water supply lines (one for hot water, one for cold) connecting to the underside of your faucet.
- At the end of each supply line, there should be a shut-off valve. These are usually small, oval-shaped knobs or T-handles.
- Turn both valves clockwise until they are completely closed.
Verifying the Water is Off:
- Once the valves are closed, go to your faucet.
- Turn on the faucet (both hot and cold) to release any remaining water pressure.
- Check that no more water is flowing from either the main faucet spout or the sprayer.
Step 2: Disconnect the Old Sprayer Hose
Now it’s time to disconnect the existing sprayer system from the faucet. This is where you’ll need your tools.
Locating the Connection Point:
- Get under the sink and locate where the sprayer hose connects to the faucet body. This is often a metal or plastic nut.
- You might also see a weight attached to the hose, which helps it retract.
Disconnecting the Hose:
- Place your bucket or towels beneath the connection point to catch any drips.
- Using your adjustable wrench or pliers, grip the nut connecting the sprayer hose to the faucet body.
- Turn the nut counter-clockwise to loosen and remove it. You may need to hold the faucet body steady with another tool or your hand to prevent it from turning.
- Once the nut is removed, you can pull the old sprayer hose down and out from under the sink.
Replacing the Sprayer Hose:
If you’re only replacing the hose, this is the point where you would connect the new sink sprayer hose replacement.
Step 3: Remove the Old Sprayer Head and Hose (If Replacing Both)
If you’re doing a full kitchen faucet sprayer replacement, you’ll need to remove the old sprayer head and the entire hose assembly.
Detaching the Sprayer Head:
- Many sprayer heads unscrew directly from the hose. Try turning the sprayer head counter-clockwise by hand.
- If it’s stuck, use pliers or an adjustable wrench, but be gentle to avoid damaging the faucet body. You might want to wrap the sprayer head with a cloth to prevent scratching.
Removing the Hose from the Faucet Body:
- As mentioned in Step 2, locate the nut connecting the hose to the faucet body under the sink.
- Use your wrench to unscrew this nut.
- Gently pull the entire hose assembly down from the faucet.
Removing the Hose Weight:
- If your old sprayer hose has a weight, slide it off the hose. You might need pliers to loosen any clamp holding it in place.
- Set the weight aside if you plan to reuse it with your new hose.
Step 4: Install the New Kitchen Sprayer Components
This is where you’ll install your new kitchen faucet sprayer parts.
Connecting the New Hose to the Faucet Body:
- Take your new sprayer hose. Some hoses come with a pre-attached connector that screws directly into the faucet. Others might have a separate fitting you need to screw onto the hose first.
- Ensure the connection at the faucet body is clean.
- Screw the new hose connector onto the faucet body. Hand-tighten it first, then use your wrench to tighten it a quarter turn more. Do not overtighten, as this can crack the fitting.
- If your new hose requires it, apply thread seal tape (Teflon tape) to the threads of the connection point before screwing it in. Wrap the tape clockwise around the threads.
Attaching the Sprayer Hose Weight:
- Locate the designated spot on the new sprayer hose for the weight. This is usually a few inches from the sprayer head.
- Slide the weight onto the hose and secure it with its clamp or screw. Ensure it allows the sprayer to retract smoothly back into its holder. This step is crucial for proper function when you install new kitchen sprayer units.
Attaching the New Sprayer Head:
- Screw the new sprayer head onto the end of the new hose.
- Hand-tighten it securely. Again, avoid overtightening. Some sprayer heads have a rubber washer inside; make sure it’s seated correctly.
Step 5: Check for Leaks and Test the Sprayer
This is the moment of truth!
Turning the Water Back On:
- Go back under the sink and slowly turn the shut-off valves counter-clockwise.
- Open both the hot and cold water supply valves.
Testing the Sprayer:
- Turn on your faucet.
- Test the main faucet stream first.
- Then, press the sprayer button. The water should now flow from the sprayer head.
- Check all connection points under the sink for any signs of leaks. Pay close attention to where the hose connects to the faucet body.
- If you see any drips, try tightening the connection slightly (just a quarter turn at a time). If the leak persists, you might need to reapply thread seal tape or check if a washer is missing or damaged.
Step 6: Clean Up
- Wipe up any spilled water with your towels.
- Remove your tools and supplies from under the sink.
- Properly dispose of the old sprayer parts.
Troubleshooting Common Issues
Even with careful work, you might encounter minor problems. Here are some common issues and how to fix them.
Leaky Sink Sprayer Fixes:
- Drip from Sprayer Head:
- Cause: Worn washer in the sprayer head or mineral buildup.
- Fix: Try unscrewing the sprayer head and cleaning the threads and any internal washers. If it continues to drip, replace the sprayer head.
- Leak at Hose Connection (Under Sink):
- Cause: Loose connection or faulty thread seal tape.
- Fix: Gently tighten the connection nut. If that doesn’t work, disconnect the hose, clean the threads, reapply fresh thread seal tape (clockwise), and reconnect. Ensure the washer is in place if your fitting uses one.
- Leak from Sprayer Hose Itself:
- Cause: Crack or hole in the hose.
- Fix: The hose needs to be replaced. This is a direct sink sprayer hose replacement situation.
Low Water Pressure from Sprayer:
- Cause 1: Clogged sprayer head.
- Fix: Unscrew the sprayer head. Soak it in a bowl of white vinegar for a few hours to dissolve mineral deposits. Scrub gently with an old toothbrush and rinse thoroughly before reattaching.
- Cause 2: Kinked or blocked hose.
- Fix: Check the entire length of the sprayer hose for any kinks or obstructions. If the hose is old and stiff, it may need replacing.
- Cause 3: Issue with the diverter valve.
- Fix: Some faucets have a diverter valve that directs water between the main spout and the sprayer. If this valve is faulty, it can reduce pressure to the sprayer. Replacing this part might be necessary if other solutions fail.
Sprayer Not Working at All:
- Cause 1: Water supply is not fully on.
- Fix: Double-check the shut-off valves under the sink.
- Cause 2: Sprayer hose is disconnected or kinked.
- Fix: Inspect connections and ensure the hose is not pinched or blocked.
- Cause 3: Faulty diverter valve.
- Fix: If the diverter valve is stuck or damaged, water won’t be sent to the sprayer. Replacing the diverter valve can solve this.
When to Call a Plumber
While many kitchen sink sprayer replacement jobs are manageable for a DIYer, there are times when calling a professional is the best course of action.
Reasons to Call a Plumber:
- Corroded or Rusted Fittings: If the nuts and connections are heavily corroded, you risk breaking pipes or the faucet body when trying to loosen them.
- Unfamiliar Faucet Design: Some high-end or older faucets have unique mechanisms that can be difficult to work with without specific knowledge.
- Persistent Leaks: If you’ve tried all the basic troubleshooting steps and still have leaks, a plumber can diagnose more complex issues.
- You’re Uncomfortable: If at any point you feel unsure or uncomfortable with the process, it’s always best to seek professional help to avoid causing further damage.
Saving Money on Your Kitchen Faucet Sprayer Repair
By tackling this task yourself, you’re already saving money on labor costs. Here are a few more tips to keep costs down:
- Identify the Problem Accurately: Before buying parts, try to pinpoint exactly what’s wrong. If only the sprayer head is leaking, just buy a new head. If the hose is damaged, a hose replacement is all you need.
- Purchase Generic or Aftermarket Parts: Many faucet manufacturers have proprietary parts that can be expensive. Look for compatible generic or aftermarket parts from reputable plumbing supply stores. Ensure they match your faucet’s brand and model for best results.
- Consider a Full Replacement Kit: If your faucet is old or multiple parts are failing, a complete sprayer replacement kit might be more cost-effective than buying individual components.
- Shop Around: Compare prices at different hardware stores and online retailers before making a purchase.
Frequently Asked Questions (FAQ)
Q1: How do I know if I need to replace the whole sprayer or just the hose?
A: If the sprayer head itself is spraying unevenly, has a cracked body, or is impossible to clean effectively, you likely need to replace the sprayer head. If the problem is a leak coming from the hose, or the hose is visibly damaged (cracked, kinked, or frayed), then a sink sprayer hose replacement is needed. Often, it’s best to replace both if the hose is old, as the connection point can become brittle.
Q2: Can I replace the sprayer hose without turning off the main water supply to the house?
A: While you must turn off the water supply at the shut-off valves under the sink, you generally do not need to turn off the main water supply to your entire house. The individual shut-off valves are designed precisely for these types of repairs.
Q3: What if my faucet doesn’t have a separate sprayer?
A: Many modern faucets have the sprayer integrated into the spout or as a pull-down or pull-out hose. The process for replacing these components will be similar, but you might need to check the specific instructions for your faucet model, as the connection points or disassembly might vary slightly. Replacing a pull-down sprayer hose, for example, often involves disconnecting the hose from a quick-connect fitting under the sink.
Q4: How do I find the right replacement sprayer or hose for my faucet?
A: The best way is to identify the brand and model of your faucet. Look for a logo on the faucet itself or check your home’s purchase records. Once you know the brand, you can often find compatible parts on the manufacturer’s website or at plumbing supply stores. Taking a photo of your existing sprayer and hose to the store can also help the staff find a match.
Q5: My new sprayer hose won’t connect properly. What could be wrong?
A:
* Wrong Part: Ensure you have the correct replacement hose or fitting for your faucet model.
* Cross-Threading: The threads might not be aligned properly. Loosen it and try again, ensuring it screws in smoothly without forcing.
* Missing Washer: Some connections require a rubber washer to create a seal. Check if your new hose or fitting came with one and if it’s properly seated.
* Damaged Threads: The threads on either the faucet body or the new hose connector might be damaged.
By following these steps and tips, you can confidently perform a kitchen sink sprayer replacement, save money, and restore the full functionality of your kitchen faucet. Happy DIYing!