
What is the best way to sharpen knives? The best way to sharpen knives involves using the right tools and techniques to restore a sharp, durable edge. Can I sharpen a knife without a sharpening stone? While some temporary solutions exist, a knife sharpening stone or whetstone is the most effective tool for achieving a truly sharp and long-lasting edge. Who is a good knife sharpener? A good knife sharpener is anyone who takes the time to learn and practice the correct methods, regardless of prior experience.
A dull kitchen knife isn’t just an annoyance; it’s a safety hazard. Knives that don’t cut cleanly require more force, increasing the risk of slipping and causing injury. Learning how to sharpen your kitchen knives perfectly will not only make your cooking easier and more enjoyable but also prolong the life of your valuable blades. This comprehensive guide will walk you through everything you need to know, from selecting the right tools to mastering the techniques for a razor-sharp edge.
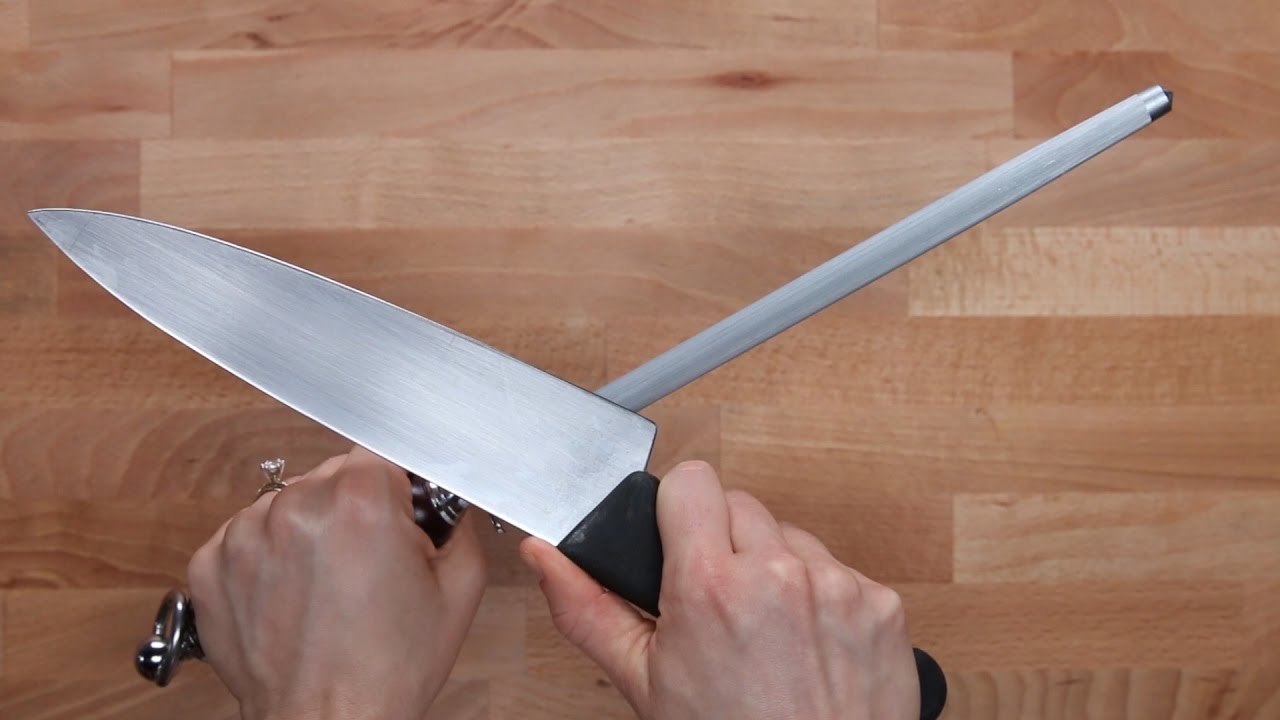
Image Source: i.ytimg.com
Why Sharpen Your Knives?
Before we dive into the “how,” let’s quickly touch on the “why.”
- Safety: As mentioned, sharp knives are safer. They require less pressure to cut, reducing the chance of your hand slipping off the blade and onto your fingers.
- Efficiency: A sharp knife slices through ingredients with ease, making prep work faster and more pleasant. Imagine effortlessly dicing an onion versus struggling with a dull blade that crushes it.
- Precision: Sharp knives allow for clean cuts, preserving the cell structure of your food. This is especially important for delicate ingredients where a clean cut maintains texture and appearance.
- Longevity: Regular sharpening and proper maintenance prevent significant damage to your knife’s edge, ensuring it performs optimally for years to come.
Essential Tools for Sharpening
There are several tools available for sharpening kitchen knives, each with its own advantages. Choosing the best way to sharpen knives often comes down to personal preference and the type of knives you own.
Knife Sharpening Stone (Whetstone)
This is the gold standard for many chefs and home cooks. Whetstone sharpening involves manually grinding the blade against an abrasive surface.
- Types of Whetstones:
- Oil Stones: These require oil as a lubricant. They are generally harder and last longer than water stones.
- Water Stones: These use water as a lubricant. They are softer and cut faster, but can wear down more quickly. They are very popular due to their ease of use and effectiveness.
- Diamond Stones: These stones have a surface coated with diamond particles. They are very aggressive and can sharpen almost any metal, but they can also be quite expensive. They typically don’t require lubrication.
- Grit Levels: Whetstones come in various grit levels, which indicate the coarseness of the abrasive particles.
- Coarse Grit (200-800): Used for repairing damaged edges or sharpening very dull knives.
- Medium Grit (1000-3000): The most common range for regular sharpening and restoring a good working edge. A 1000-grit stone is a great starting point.
- Fine Grit (4000-8000+): Used for refining and polishing the edge, making it exceptionally sharp and smooth.
- Ultra-Fine Grit (10000+): For mirror polishing and achieving the absolute sharpest edge possible.
Honing Steel (Sharpening Steel)
A honing steel usage is often misunderstood. A honing steel, also called a sharpening steel or honing rod, doesn’t actually sharpen the knife in the sense of removing metal to create a new edge. Instead, it realigns a microscopic burr that forms on the edge of your blade during use. Think of it like straightening a tiny, bent wire.
- Sharpening Steel Types:
- Steel Rods: The most traditional type. They are effective for daily maintenance.
- Ceramic Rods: Harder than steel and can also hone very effectively. Some can even do light sharpening if they have a textured surface.
- Diamond Rods: Coated with diamond particles, these are more aggressive and can both hone and lightly sharpen.
Electric Knife Sharpener
These devices offer speed and convenience. You simply draw the knife through slots with pre-set angles.
- Pros: Fast, easy to use, consistent angles.
- Cons: Can remove a lot of metal, potentially shortening the life of your knife. Less control over the sharpening process. Might not be suitable for very expensive or specialized knives.
Manual Knife Sharpener
These are simpler, often handheld devices with abrasive wheels or slots.
- Pros: Relatively inexpensive and easy to store.
- Cons: Often have fixed angles that might not be ideal for all your knives. Can be aggressive and remove too much metal if not used carefully. They are generally considered a step up from electric sharpeners in terms of control but still offer less precision than stones.
Mastering Whetstone Sharpening: The Art of the Edge
For the absolute best results and the most control over your knife’s edge, whetstone sharpening is the way to go. This method requires patience and practice, but the reward is a knife that cuts like a dream.
Preparing Your Whetstone
- Soaking Water Stones: Most water stones need to be soaked in water until they stop producing air bubbles. This usually takes 5-10 minutes, but check the manufacturer’s instructions. Some stones are “splash and go” and don’t require soaking.
- Lubrication: Once soaked, place the stone on a stable surface. A non-slip mat or a damp cloth underneath is essential to prevent the stone from sliding. You’ll use water as your lubricant. Keep a small pitcher of water handy to re-wet the stone as you work.
Finding the Correct Sharpening Angle
This is arguably the most crucial part of whetstone sharpening. Different knives and manufacturers recommend different angles.
- General Guidelines:
- Japanese Knives: Typically have a sharper, more acute angle, often around 10-15 degrees per side.
- Western/German Knives: Tend to have a wider, more durable angle, usually between 15-20 degrees per side.
- Utility/Bread Knives: May have even wider angles for durability.
- Using a Sharpening Angle Guide: These small clips attach to the spine of your knife and help maintain a consistent angle against the stone. They are incredibly useful for beginners. Without a guide, you can find the angle by tilting the blade until the edge lies flat against the stone, then doubling that angle. For 15 degrees, it’s like holding the blade halfway between flat and vertical.
The Sharpening Process: Step-by-Step
We will focus on using a dual-grit knife sharpening stone, which typically has a coarser grit on one side and a finer grit on the other.
Step 1: Coarse Grit (If Needed)
- Purpose: To remove metal and establish a new edge, or repair chips.
- Technique:
- Place the coarse side of the whetstone up.
- Hold the knife at the desired sharpening angle (e.g., 15 degrees). Use your index finger to apply light, consistent pressure on the blade near the edge.
- Begin with the heel of the blade (closest to the handle). Move the blade forward and backward across the stone in a sweeping motion, maintaining the angle. Imagine you are trying to remove a thin layer from the entire width of the stone.
- Work from heel to tip, ensuring the entire edge makes contact with the stone.
- Repeat this motion for about 10-20 strokes.
- Check for a Burr: After several strokes, gently feel the opposite side of the edge. You should feel a slight “catch” or rough ridge – this is the burr. It indicates you’ve ground through the metal.
- Once you feel a burr along the entire length of the blade, flip the knife and repeat the process on the other side for the same number of strokes, maintaining the angle, until a burr forms on the first side.
Step 2: Fine Grit (Refining the Edge)
- Purpose: To refine the edge created by the coarse stone, making it smoother and sharper.
- Technique:
- Flip the whetstone to the finer grit side. Re-wet the stone if it has dried out.
- Repeat the same motion as with the coarse stone, maintaining the sharpening angle.
- Perform the same number of strokes on each side, working on creating a burr on each side, then reducing it.
Step 3: Deburring and Stropping (Optional but Recommended)
- Purpose: To remove the burr completely and polish the edge.
- Technique:
- Once you’ve finished with the fine grit, you want to remove the burr. Do this by making lighter passes, alternating sides.
- Start with a light pass on one side, then a very light pass on the other side.
- Gradually reduce the number of strokes, making them lighter each time, alternating sides (e.g., 5 strokes per side, then 3, then 1).
- Stropping: Many people use a leather strop (often with a polishing compound) after stones. This is like a very fine-grit abrasive surface that polishes and aligns the edge to its final keenness. Stropping is typically done with very light pressure, moving the blade away from the edge.
Step 4: Cleaning and Testing
- Cleaning: Rinse your knife thoroughly with water and dry it immediately to prevent rust. Clean your whetstone by rinsing it and letting it air dry completely before storing.
- Testing: The safest way to test sharpness is to try slicing a piece of paper held vertically. A sharp knife will slice through it cleanly without snagging or tearing.
Honing Steel Usage: Maintaining Your Sharpness
Regular honing is key to keeping your knives sharp between sharpenings. This is where honing steel usage comes into play.
How to Hone a Knife
- Secure the Honing Steel: Hold the honing steel vertically, with the tip resting on a stable surface (like a cutting board or counter).
- Position the Knife: Place the heel of the knife blade against the top of the steel at the desired sharpening angle (usually the same angle you sharpen at).
- The Stroke: Draw the knife down the steel in a smooth, controlled motion, maintaining that angle. The goal is to bring the entire edge down the length of the steel.
- Alternating Sides: Once you’ve drawn the blade down one side, immediately move to the other side of the steel with the other side of the blade, maintaining the same angle.
- Repeat: Perform 5-10 strokes on each side. Use light pressure. The goal is to realign the microscopic edge, not to grind it down.
- Wipe and Test: Wipe the blade with a clean cloth and test its sharpness.
Electric and Manual Sharpeners: Convenience with Caveats
While whetstones offer the most control, electric and manual sharpeners can be a good option for those prioritizing speed and ease.
Electric Knife Sharpener Usage
- Follow Instructions: Each electric sharpener is different. Always read the manufacturer’s manual carefully.
- Slot Selection: Most have multiple slots for different stages (coarse, fine) or different knife types.
- Angle: They have pre-set angles, so ensure they match your knives.
- Pressure: Do not force the knife. Let the machine do the work.
- Frequency: Use sparingly, as they can remove a significant amount of metal.
Manual Knife Sharpener Usage
- Angle Consistency: Hold the knife at the correct angle as you draw it through the slots. Many have guides for this.
- Gentle Pressure: Again, avoid pressing too hard.
- Sequence: Use the coarsest grit slot first (if available), followed by finer grit slots to refine the edge.
- Test: Check the edge often to avoid over-sharpening.
Knife Edge Repair: Tackling Damage
Sometimes, your knife’s edge might have chips or significant dullness that goes beyond regular sharpening. This is where knife edge repair becomes important.
Dealing with Chips
- Coarse Grit is Key: You’ll need a coarse grit whetstone (around 200-600 grit) or a diamond stone.
- Focus on the Chip: You need to grind away the metal around the chip to create a new, smooth edge. This might involve holding the knife at a slightly steeper angle initially to grind away the damaged area.
- Patience: This process can take time and considerable effort. You’re essentially reshaping the very tip of the blade.
- Progressive Grits: Once the chip is ground out, move to medium and then fine grit stones to restore the edge, just as you would with regular sharpening.
Extreme Dullness
If your knife is so dull that it won’t even cut paper, start with a medium grit whetstone (around 1000 grit) or even a coarse grit if it’s severely neglected. Follow the standard sharpening process outlined above.
Choosing the Right Sharpening Method for You
The best way to sharpen knives is subjective and depends on your needs, the knives you own, and your willingness to learn.
- For the Enthusiast/Home Chef: Whetstone sharpening offers the best control and results, providing a truly superior edge. It’s an investment in skill and excellent tools.
- For Convenience and Speed: An electric knife sharpener is a quick solution for maintaining a usable edge, especially if you have many knives or limited time. Be mindful of metal removal.
- For Budget-Conscious Simplicity: A good manual knife sharpener can be a decent option for basic sharpening, but always choose one with reputable abrasive materials and consider fixed-angle guides.
- For Daily Maintenance: A honing steel is indispensable for keeping your edges aligned and performing optimally between sharpenings. Regular honing steel usage will make your knives feel sharper for longer.
Caring for Your Sharpened Knives
Sharpening is only part of the equation. Proper care ensures your hard-earned sharp edge lasts.
- Wash by Hand: Never put your good kitchen knives in the dishwasher. The harsh detergents, heat, and tumbling can dull and damage the edge, as well as the handle. Wash with warm, soapy water and dry immediately.
- Use Proper Cutting Surfaces: Avoid glass, ceramic, or metal cutting boards. Use wood, bamboo, or plastic.
- Store Safely: Use a knife block, magnetic strip, or blade guards to protect the edges from damage and prevent accidents.
- Hone Regularly: As mentioned, use your honing steel frequently.
Frequently Asked Questions (FAQ)
- How often should I sharpen my knives?
This depends on usage, but a good rule of thumb is to sharpen when you notice a decline in cutting performance. For heavy users, this might be every few weeks. For moderate users, every few months might suffice. Honing should be done much more frequently, ideally before each use. - Can I use the same sharpening stone for all my knives?
Yes, but be mindful of the sharpening angle required for different knives. A knife sharpening stone with a medium grit (1000) is versatile for many common kitchen knives. - What is a “burr” and why is it important?
A burr is a thin, wire-like edge that forms on the opposite side of the blade when you’re grinding metal. It indicates you’ve ground through the material. Removing the burr completely is crucial for a sharp, clean edge. - Do I need different stones for different steels?
Not typically for standard kitchen knives. Most whetstones are effective on common stainless steel and high-carbon steel blades. Very specialized or exotic steels might benefit from specific abrasives, but this is rare for everyday kitchen knives. - How do I know if my knife is sharp enough?
The paper test is a good indicator. A truly sharp knife will slice cleanly through a sheet of paper held vertically with minimal effort. You should also feel a noticeable difference in how easily it cuts through produce.
By dedicating a little time and attention to learning how to sharpen your kitchen knives, you’ll unlock a new level of efficiency, safety, and enjoyment in your culinary endeavors. Whether you choose the meticulous path of whetstone sharpening, the quick convenience of an electric sharpener, or the vital maintenance of a honing steel, a sharp knife is a cook’s best friend.