
Is your kitchen sink draining slower than a sleepy turtle? A clogged kitchen sink is a common household nuisance that can bring your kitchen activities to a grinding halt. What is the quickest way to unstop a kitchen sink? You can often clear a clogged sink quickly using simple household items like baking soda and vinegar or by using a sink plunger. Can I unstop my sink without chemicals? Absolutely! Many effective methods for drain cleaning don’t require harsh chemical drain cleaners. This guide will walk you through several easy DIY solutions and essential tips to tackle that stubborn blockage and restore your sink’s flow. We’ll cover everything from simple plunging techniques to more involved methods for removing pipe blockage, ensuring you can get your sink working again fast.
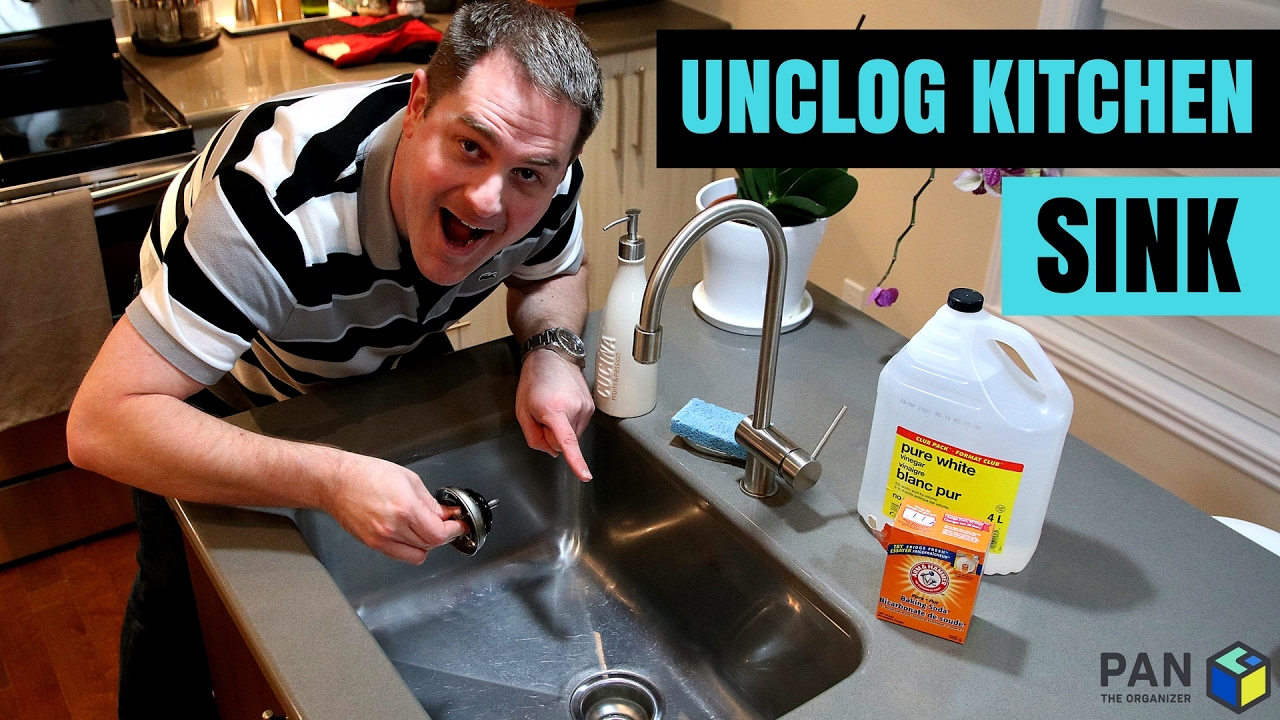
Image Source: i.ytimg.com
Why Does My Kitchen Sink Get Clogged?
Grasping the common culprits behind a clogged sink is the first step in prevention and effective clearing. Kitchen sink clogs are usually caused by a buildup of various materials that get washed down the drain.
Common Causes of Kitchen Sink Clogs:
- Grease and Oil: When hot grease or oil is poured down the drain, it cools and solidifies as it travels through the pipes. This sticky substance traps other debris, gradually narrowing the pipe and eventually leading to a complete blockage.
- Food Scraps: Small food particles, coffee grounds, eggshells, pasta, rice, and vegetable peels are major offenders. Even with a garbage disposal, some items can cause problems.
- Soap Scum: Over time, soap residue can build up on the interior walls of your pipes. This sticky film can snag other debris, contributing to a clog.
- Foreign Objects: Accidental drops of small items like bottle caps, silverware, or even children’s toys can lodge in the pipes and obstruct water flow.
- Hair: While more common in bathroom sinks, hair can also find its way into kitchen drains, especially if you’re washing long-haired pets or yourself in the kitchen sink.
Easy DIY Methods to Unstop Your Kitchen Sink
When faced with a blocked drain, reaching for a chemical drain cleaner might seem like the easiest solution. However, these can be harsh on your pipes and the environment, and sometimes they just don’t work. Fortunately, there are several effective and eco-friendly DIY methods you can try.
Method 1: The Power of Hot Water
Sometimes, a simple pour of hot water can resolve a minor clog, especially if it’s caused by grease.
Steps for Using Hot Water:
- Boil Water: Heat a kettle or pot of water to boiling. Be cautious when handling hot water.
- Pour Slowly: Carefully and slowly pour the boiling water directly down the drain. Pouring slowly helps ensure the heat has time to work on the blockage.
- Wait and Test: Let the hot water sit in the drain for a few minutes. Then, try running the tap to see if the water drains.
- Repeat if Necessary: For stubborn clogs, you might need to repeat this process a couple of times.
Important Note: This method is best for clogs caused by grease or soap scum. Avoid using boiling water if you have PVC pipes and suspect a complete blockage, as extreme heat could potentially damage them. If the sink is completely full of standing water, remove as much of it as possible before pouring hot water.
Method 2: Baking Soda and Vinegar – The Classic Combination
This age-old remedy is a fantastic way to tackle grease and grime without harsh chemicals. The reaction between baking soda and vinegar creates a fizzy foam that can help dislodge blockages.
What You’ll Need:
- 1 cup of baking soda
- 1 cup of white vinegar
- Hot water
- A stopper or rag to cover the drain
Steps for Baking Soda and Vinegar:
- Clear the Sink: Remove as much standing water as possible from the sink.
- Pour Baking Soda: Pour the cup of baking soda directly down the drain.
- Add Vinegar: Immediately follow with the cup of white vinegar. You’ll notice a fizzing reaction.
- Cover the Drain: Quickly cover the drain with a stopper or a damp rag. This helps to direct the fizzy reaction downwards into the clog.
- Let it Work: Allow the mixture to sit for at least 15-30 minutes, or even longer for tougher clogs.
- Flush with Hot Water: After the waiting period, pour another kettle of hot (not necessarily boiling) water down the drain to flush away the loosened debris.
- Test the Drain: Run your tap to see if the clog has cleared.
Method 3: Using a Sink Plunger
Plunging a sink is one of the most effective ways to clear a clog because it uses air pressure to dislodge the blockage. It’s crucial to use the correct type of plunger for best results.
What You’ll Need:
- A sink plunger (a cup-shaped plunger, not the flange-type toilet plunger)
- Water to create a seal
- A rag or stopper for the other drain (if you have a double sink)
Steps for Plunging a Sink:
- Prepare the Sink: Ensure there’s enough water in the sink to cover the rubber cup of the plunger. This creates a better seal.
- Seal the Other Drain: If you have a double sink, block the other drain with a wet rag or stopper. This prevents air from escaping through the second drain, concentrating the pressure on the clog.
- Position the Plunger: Place the sink plunger firmly over the drain opening, ensuring a tight seal.
- Plunge Vigorously: Push and pull the plunger up and down with consistent, forceful strokes for about 20-30 seconds. The goal is to create suction and pressure to break up the blockage.
- Check for Flow: Lift the plunger quickly. If the water starts to drain, you’ve likely cleared the clog.
- Repeat if Necessary: You might need to repeat the plunging process several times to completely remove the blockage.
- Flush with Hot Water: Once the water is draining, run hot water down the sink to flush out any remaining debris.
Method 4: The Drain Snake (or Auger)
For clogs that are deeper in the pipe or too stubborn for other methods, a drain snake is your next best bet. This flexible tool can be fed into the pipe to physically break up or retrieve the blockage.
What You’ll Need:
- A drain snake (also known as a plumbing snake or auger)
- Gloves
- A bucket or plastic bag to collect debris
- A rag
Steps for Using a Drain Snake:
- Insert the Snake: Feed the end of the drain snake into the drain opening.
- Push and Rotate: Gently push the snake into the pipe until you feel resistance, indicating a clog. Once you hit the clog, begin rotating the handle of the snake clockwise. This helps the auger head to bore into or hook onto the blockage.
- Break Up or Retrieve: Continue rotating and pushing gently. You’re either breaking up the clog into smaller pieces that can be flushed away, or you’re snagging it so you can pull it out.
- Pull Out the Snake: Slowly pull the snake back out of the drain. If you’ve snagged the clog, be prepared for some messy debris to come with it. Dispose of it properly in a bucket or bag.
- Flush the Drain: Once the snake is removed, run hot water down the sink for several minutes to clear out any remaining debris and ensure the pipe is clear.
- Repeat: If the clog persists, you may need to repeat the process, perhaps trying to push the snake a bit further or rotating it more vigorously.
Method 5: Removing the Pipe Blockage from the P-Trap
If the above methods haven’t worked, the clog might be located in the P-trap, the U-shaped bend under your sink. This is where a lot of debris tends to collect.
What You’ll Need:
- A bucket
- Wrench (adjustable or pipe wrench)
- Gloves
- Old rags or towels
Steps for Clearing the P-Trap:
- Prepare for Mess: Place a bucket directly underneath the P-trap to catch any water or debris that will come out. Have rags ready to wipe up spills.
- Locate and Loosen: The P-trap is usually connected by two slip nuts. Use a wrench to loosen these nuts. They might be hand-tight or require a wrench. Turn them counter-clockwise.
- Remove the P-Trap: Once the nuts are loose enough, carefully detach the P-trap. Be prepared for water to flow into the bucket.
- Clean the P-Trap: Inspect the P-trap for any obstructions. You can usually clear it by hand or by using a brush. Dispose of any debris in the bucket.
- Check the Pipes: While the P-trap is off, you can also carefully reach into the pipes on either side to check for any visible blockages.
- Reassemble: Reattach the P-trap, ensuring the slip nuts are hand-tightened first, then snugged with a wrench. Do not overtighten, as this can crack the plastic or strip the threads.
- Test for Leaks: Run water into the sink and check the connections for any leaks. Tighten the nuts slightly if you see drips.
- Flush and Test: Once you’re confident there are no leaks, run hot water down the drain to test the flow.
What About Chemical Drain Cleaners?
While not always the first choice for DIY enthusiasts, chemical drain cleaners are readily available and can be effective for certain types of clogs. However, they come with significant drawbacks.
Types of Chemical Drain Cleaners:
- Caustic Cleaners: Contain lye (sodium hydroxide) or potassium hydroxide. They work by breaking down grease, hair, and other organic matter through a chemical reaction that generates heat.
- Acidic Cleaners: Contain strong acids like sulfuric or hydrochloric acid. They are very potent and work by dissolving clogs rapidly. These are usually for industrial use or severe blockages and are not recommended for home use.
- Oxidizing Cleaners: Contain bleach or other oxidizing agents. They work by releasing oxygen to break down clogs.
When to Consider Chemical Drain Cleaners (and When Not To):
Consider Them If:
- You have a minor clog that other methods haven’t resolved.
- You are dealing with a clog composed primarily of grease or hair.
Avoid Them If:
- You have old or weak pipes (especially metal pipes that can corrode).
- You have a septic system, as chemicals can disrupt the bacterial balance.
- You have a slow draining sink that isn’t completely blocked, as chemicals might not reach the clog effectively and can damage the pipes in the process.
- You have already tried other methods, especially plunging, as mixing chemicals with residual plunging attempts can create dangerous fumes or splashes.
- You have a garbage disposal, as chemicals can damage the unit.
Safety Precautions for Chemical Drain Cleaners:
- Read and Follow Instructions: This is paramount.
- Wear Protective Gear: Always wear gloves, eye protection, and long sleeves.
- Ventilate the Area: Open windows and turn on fans.
- Never Mix Chemicals: Combining different drain cleaners or using them with other household cleaners can create toxic gases.
- Keep Away from Children and Pets: Store them securely.
- Use Sparingly: Overuse can damage pipes.
Preventing Future Kitchen Sink Clogs
Prevention is always better than cure, especially when it comes to your plumbing. Implementing a few good habits can significantly reduce the chances of experiencing another clogged sink.
Key Prevention Tips:
- Scrape Plates Thoroughly: Before rinsing dishes, scrape all food scraps into the trash or compost bin.
- Avoid Pouring Grease Down the Drain: Collect grease and oil in a container and dispose of it in the trash once it solidifies.
- Use a Sink Strainer: A good quality sink strainer will catch larger food particles and debris, preventing them from entering the pipes. Empty it regularly.
- Run Cold Water with Garbage Disposal: If you have a garbage disposal, always run cold water for at least 20-30 seconds before and after using it. This helps to flush food particles through the system and solidify grease so it can be chopped and washed away.
- Be Mindful of What Goes Down the Drain: Avoid putting coffee grounds, eggshells, fibrous vegetables (like celery or onion skins), pasta, rice, or fruit pits down the drain, as these are common culprits for clogs.
- Regular Drain Cleaning: Periodically use the baking soda and vinegar method or run hot water down the drain to keep it clear of minor buildup.
Frequently Asked Questions (FAQ)
Q1: How long should I wait before using another method if the first one doesn’t work?
A1: If your first attempt, like plunging, doesn’t work, wait about 15-30 minutes before trying another method. This gives the pipes a chance to settle and prevents overwhelming them with too many simultaneous treatments, especially if you consider using chemicals.
Q2: Can I use a toilet plunger for a kitchen sink clog?
A2: It’s best to use a sink plunger. Toilet plungers have a flange at the bottom designed to seal the toilet bowl, which won’t create an effective seal in a flat sink drain. A sink plunger has a simple cup shape that works best for flat surfaces.
Q3: My sink is still draining slowly after trying these methods. What should I do?
A3: If your sink is still experiencing a slow draining sink even after these DIY attempts, it may indicate a more significant blockage further down the main drain line or a problem with your home’s venting system. At this point, it’s advisable to call a professional plumber.
Q4: How often should I do a preventative drain cleaning?
A4: For most households, performing a preventative drain cleaning with baking soda and vinegar or hot water once a month is usually sufficient to maintain clear pipes. If you frequently dispose of grease or food scraps, you might consider doing it more often.
Q5: Is it safe to use a chemical drain cleaner if I have a garbage disposal?
A5: It’s generally not recommended to use chemical drain cleaners with garbage disposals. The harsh chemicals can damage the disposal unit’s blades, seals, and motor. Stick to mechanical methods or baking soda and vinegar for clogs in sinks with disposals.
Q6: I removed the P-trap and it looked clean, but the sink is still clogged. What now?
A6: If the P-trap is clear, the blockage is likely further down the pipe. This is where a drain snake becomes essential. You might need to feed it further into the pipe to reach and dislodge the stubborn clog that’s causing your slow draining sink.
By following these easy DIY guides and tips, you can effectively unstop your kitchen sink fast and keep it running smoothly. Remember to prioritize safety and consider the type of clog you’re dealing with when choosing a method. Happy plunging and clearing!